
Online Licensing has the option for the public to send in donations outside of adding a license. In the case that someone has donated to your organisation, you may want to send them a bespoke receipt to thank them from their donation, rather than a generic receipt. This document walks you through how to do that.
- From your Shelter Buddy site, click the Administration link in the left-hand menu.
- Search for and click on the Templated Documents link.
- From the menu, click on the link Receipts.
- Click the +Create button to open a new Templated Document.
- Set the Location as required using the drop-down. It will default to your login location, but you may want the document to be set for All locations, for example.
- Enter the name of the document in the Description field. This should identify the document for users moving forwards.
- The Type will default to Receipt, leave that as it is.
- From the Receipt Category drop-down, select the template option for Donation
- If the document is only available for specific animal types (e.g. if you have different versions for dogs vs cats) then select your Animal Type from the multi-select drop-down, otherwise leave this set at "all".
- Use the Body canvas to create the document as you want it to appear in your customer's inbox. This can be set to include information specific to the situation by using placeholders:
- The current date assigns the date that the form was created.
- Current User - The current user offers options to represent the person who created the form in various different ways.
- Create a page break to force content to a new page does exactly that. Typically, this is found in the tool menu at the top of the canvas but this feature did not support it there so we have enabled it in the placeholders instead.
- To add basic information about your organisation (Organisation Name, abbreviation, phone number, address), use the Site - The Shelter/Sanctuary/Society/Etc and use the placeholders. This is taken from System Options and is the overall information for the organisation.
- Receipt - The receipt offers options to display options relating to costs and specific items on the receipt. It also has options for information such as surrender reasons.
- Within this option are sub-options for Region and Added by User. These options relate specifically to the items within the category, not the receipt as a whole necessarily.
- Shelter Address - The shelter address offers options for the Physical Location the user was logged in as at the time of the transaction.
- Add a signature by applying The signed signatures or spaces for manual signing Add Collection box, then click to enter the placeholder inside the red text box you just created. This will either show a digital signature, or lines for manual signature as required. It will also show the date the form was generated/signed.
- To list all animals being added to the form, click Add Collection for the option The animals on the receipt. Add the placeholder inside the red bordered box to make sure they all work. NOTE: you can type free text into this box as well, which may help. Options for animal information are available in this collection.
- The Payments on the receipt is a collection that allows you to include options relating specifically to the Payment Amount, and how it was paid. Click Add Collection then enter your selected information within the red text box.
- The allocations on the receipt offers information relating to how fees were allocated.
- Click Add Collection then enter your selected information within the red text box.
- You can also just free type directly into the Body canvas.
- If your customers require this form be available in various languages, you will need to recreate the form in any additional language (it does not auto-translate, but when printing the forms later it will offer an option to select which language you would like it offered in).
- When your changes are complete, click Save or click Cancel to discard and return to the menu.
- Once saved, the Templated Documents/Receipts menu will display. Your new template will be visible in the list.
- This will automatically link to your online licensing site for donation receipts only.
IMPORTANT
The receipts will only generate correctly if they have been set up to generate as PDF documents. To do that, follow these steps:
- From your Shelter Buddy site, click the Administration link in the left-hand menu.
- Search for Receipt Administration and click when you find it.
- In the menu, click on the option PDF Document Generation Administration
- On the resulting page, find the option for Donation and either click the box to tick it, or ensure it is already ticked like so:
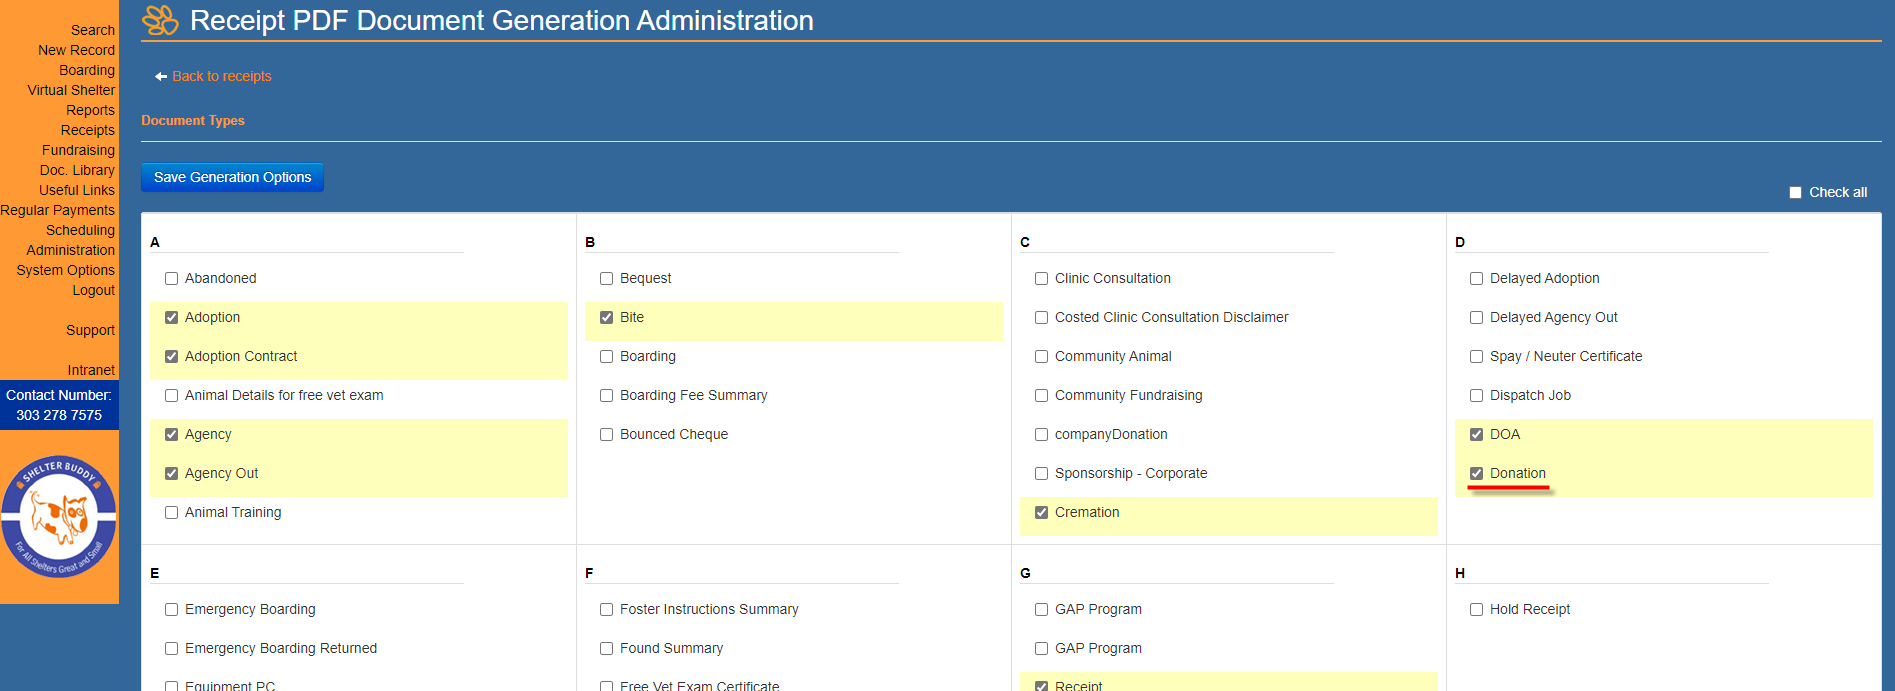
- Save your changes by clicking Save Generation Options.
Please contact support@shelterbuddy.com if you have any questions.
Comments