
This process gives a volunteer access to the VolunteerBuddy Portal so they can log their times and set their own rosters. It records information such as their qualifications and assigns what volunteer location(s) they are available to work at.
NB: an email address is required to create VolunteerBuddy logins.
To Create a Volunteer Login:
- From the Welcome/Search page, use the Person Search fields to find the record of the person who wishes to volunteer. If they do not have one already, you will need to create one for them. Ensure an email address is entered.
- From the Person Details Page, scroll down to the Person Categories at the bottom and locate the one labelled Volunteer.
- Click on this link and a pop-up will ask you if you wish to create a login for this person. Click Yes.
- A modal will appear asking you to select which email address to use for the person. If there is only one, you may just click the Yes button. However, if there are multiples, select by clicking the preferred email as shown here:
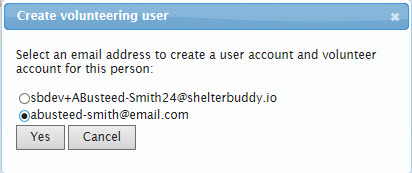
- Click Yes.
- The system will automatically email the volunteer with a welcome email and a link with which to set their password.
- IMPORTANT: if there is an email visible on the file, but when you click the Volunteer link it tells you that you must enter one, this means that the email present on the file is already being used for a Volunteer Buddy login. This person may have a duplicate file so you will need to merge them.
IMPORTANT: If when you click the Volunteer link and you see the message "Are you sure you want to create a volunteer account for this person?" and you don't see any options to select an Email Address it could be that the customise setting "DoesUseVolunteerSignOn" is set to false this must be true when using VolunteerBuddy. - The volunteer's details will open in the VolunteerBuddy portal, with information imported from their Shelter Buddy Person Details page:
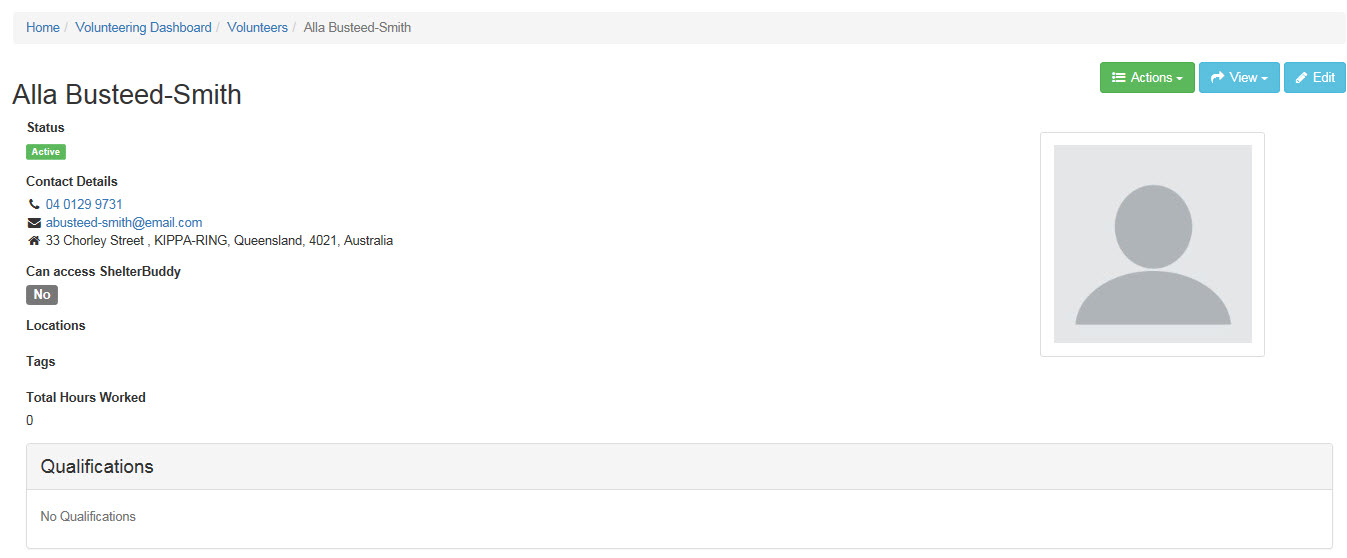
Note: the photo image is pulled from the Person Details page. It cannot be loaded via this page at this time. - Click on the button Edit to add information.
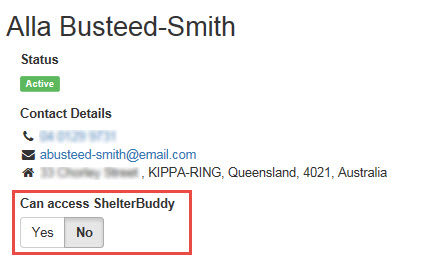
- You will note the Can access ShelterBuddy option defaults to No. If the volunteer will be required to use Shelter Buddy to enter data etc., click the Yes option and they will be able to access the site directly from their volunteer dashboard page.
- Click into the Locations box to select a valid Volunteer Location from the drop-down. Note: locations cannot be added more than once. Only valid Volunteer Locations are offered by this drop down.
- Click into the Tags to enter a tag that will help identify the volunteer as part of a program, or as requiring special assistance etc. Select an existing Tag from the drop down, or enter a new tag by typing the name and selecting the option Create Option "~" that appears beneath the box.
- Use the Notes free text field to enter any information relevant to this volunteer.
- Under the heading Qualifications, click the button +Add Qualification
- From the drop-down that appears, select a qualification relevant for this volunteer. (See Add Qualifications for more information)
- If the qualification is one that has an expiry date (e.g. a license or vaccination), enter the date it was given into the Effective Date box by clicking in the box and making a selection from the calendar feature. The date will default to today (i.e. the date the qualification was assigned).
- If relevant, an Expiry Date can be added the same way.
- Click the button +Add Qualification to add subsequent qualifications.
- To remove a qualification, click the [x] at the right-hand end of the relevant row.
- When completed, click the Save button, or Cancel to navigate away without saving your changes.
- The volunteer is now available for rostering!
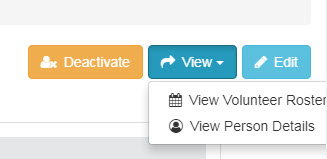
- Once the page returns to the main view, you can use the View button to view the Volunteer Roster, or go to the Person Details page on Shelter Buddy:
- Click the Deactivate button if the person is no longer an active volunteer. This will prevent them from being offered to the roster.
Comments