
Volunteer Locations are places a person may volunteer at and usually represent a physical place. There are two kinds of Volunteer Location: one that matches the Physical Location of a shelter, and one that has no corresponding Physical Location on Shelter Buddy but is nevertheless a valid location for a volunteer to be (e.g. an Op Shop).
To Add a New Location:
- From the Welcome/Search page, click the link for VolunteerBuddy in the orange left-hand menu.
- When the VolunteerBuddy portal loads, click the down arrow against the heading More and click on the option for Location. This will load the main Location overview page.
- Click on the button +Add Location
- A dialogue box will appear. At the top will be a heading Create From Shelter Buddy and beneath it buttons that say Yes and No. The button will have Yes defaulted.
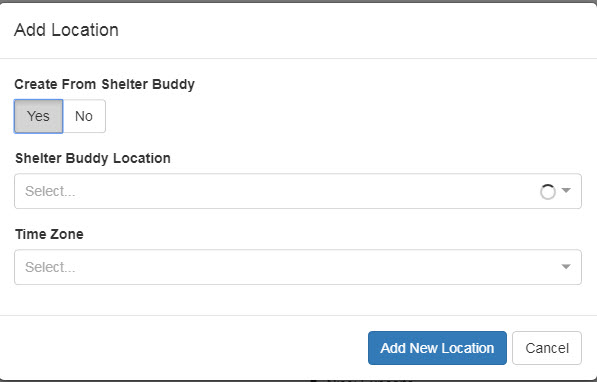
- If the new location is to match a Physical Location/Region that exists on your Shelter Buddy site, leave this button set to Yes and select a Shelter Buddy Location from the drop down by clicking the down arrow and making a selection.
- If the new location does not correlate to a Shelter Buddy location, change the Create From Shelter Buddy button option to No. New fields will appear to add a Location Name and three lines in which to enter the Address. Enter the information as required:
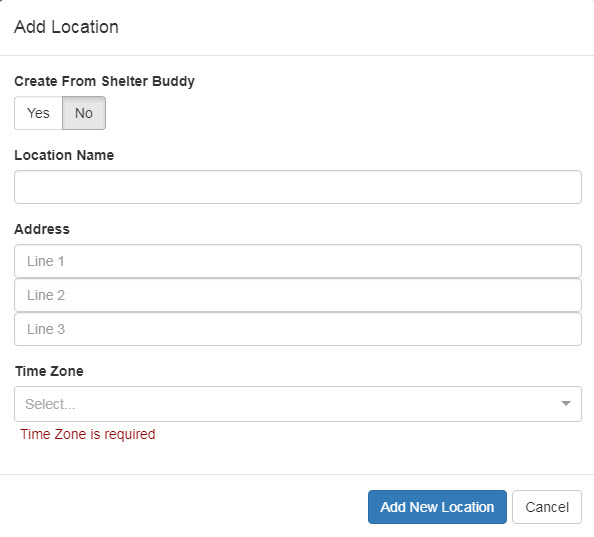
- Once the location details have been entered, you will need to enter a Time Zone. This is a required field and helps with rostering - especially for sites that are spread out over multiple time zones. Time Zones use UTC time (Coordinated Universal Time). To set a time zone, simply select from the drop down or type in the name of the nearest relevant city for the list to auto-find it. When done, click the Add New Location button.
- Once set up, the new location will appear in the list something like this:

- To enter Location Coordinator Contact Details, click the Edit button seen top right of the screen above.
- On the resulting page, fields will open up for you to enter the Name, Contact Phone Number and Email address of the Location Coordinator.
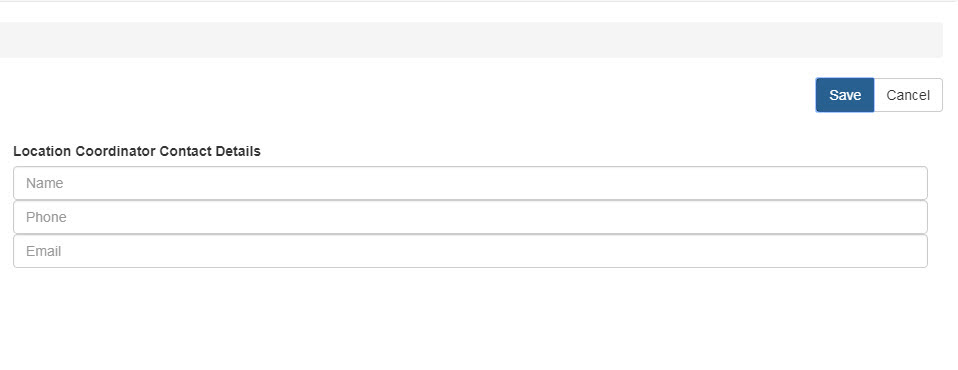
- Enter this information as required and click the Save button to return to the main Locations page. Alternately, click Cancel to exit without editing.
- Repeat as required. This is the first step in setting up your system to begin rostering volunteers. Once all necessary locations have been set up, click the Home link to return to the Welcome screen, or make another selection from the menu at the top left of the screen.
Comments