

You are now able to print labels for your medications with customisable instructions for administration. These labels have been designed and tested for the Zebra GK420T printer.
- Add a Medication to the animal using whichever approach is most convenient. (See Add Medication - Complete Guide or Add Medication (No Administer option) for more information)
- Proceed to complete the medication fields as normal.
- At the bottom of the Add Medication dialogue, there is a field called "Medication Label Instructions (this will override the automated instructions)":
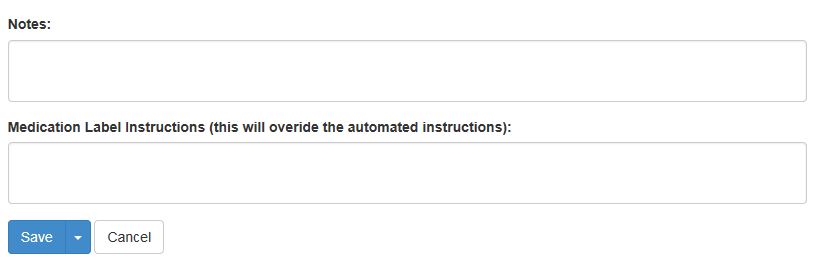
- If you would like the label to print instructions to your preferred specifications, enter the instructions as you would like them to appear in this box:

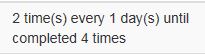
- This box is not mandatory, it simply overrides automated settings with your preferred formatting. If you do not enter anything here, you can still print the label. It will simply display the information as it does on the Animal Tasks page. e.g.
- If you would like the treating Veterinarian to appear in the bottom right corner of the label, select one from the Prescribing Vet drop-down. If you do not select one, this will be left blank on the label.
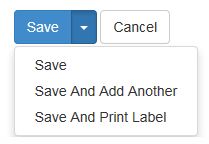
- Once completed, click the down arrow on the Save button to find the option Save and Print Label.
- Click this option to open the print page, which will look something like this (example with no veterinarian selected):
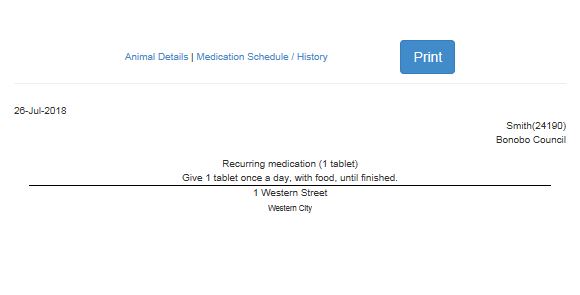
or like this, if you left the Medication Label Instructions field blank (example with veterinarian selected):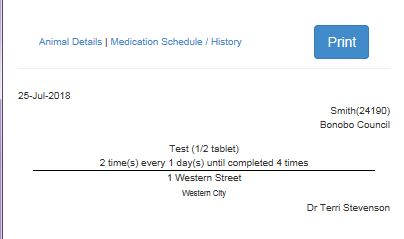
- Click Print to print the label
- Click Animal Details to return to the Animal Details main page.
- Click Medication Schedule/History to return to the Medication Schedule/History view of the Animal Tasks list.
Alternately, you can also print labels via the Medication Schedule/History and Animal Tasks pages.
The Save and Print Label option is available when adding a new medication via these pages, but for existing medications, you can also click the down arrow on the Actions button adjacent to the medication you would like to print a label for and select Print Label. This will take you to the same Print page as above, with the same options.
Troubleshooting:
If you are using Microsoft Edge and find the label isn't fitting neatly onto the label, please take the following steps:
- From the print medication screen, click on the cog icon in the top right-hand corner of your browser, then click on the option "Page Setup"
- In the section "Headers and Footers", make sure all options read 'Empty'
- In the Margins (millimetres) column, make the options for the Left, Right and Bottom margins '0' (zero).
- In that same section, ensure the option for Top margin is set at 10
- Your page should look like this:
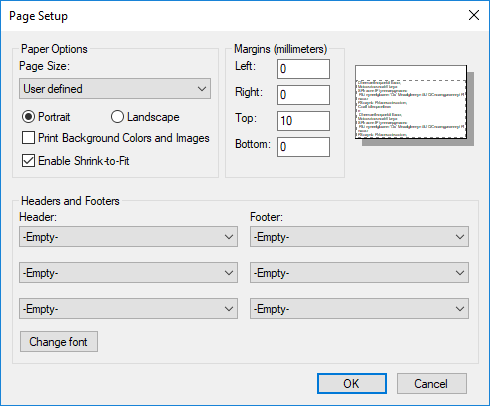
- Click ok to save
- You can now print your label!
Comments