

The Identification & Services Personal Category allows you to attach an animal to a person purely for identification purposes (e.g. for micro-chipping events) or to set up a file ready for some other purpose such as a spay/neuter campaign or pre-surrender information.
There are two stages to Identification & Services: Administration set up and adding the animals.
Part One - Administration:
You will need access to the Administration menu to process these functions.
Identification & Services allows you add your own options for identification types (e.g. microchip or shelter-linked identification tag) or event (e.g. spay/neuter campaign).
1) To set these up go into Administration, then Edit Drop Down Lists
2) Locate Identification PC Type / event on the page and click Maintain.
3) To set up a new Identification PC Type/Event:
a) Click the link New Record
b) In the box marked Description enter the name of the Identification type or Event (Limit: 50 characters including spaces)
c) If you will be generating receipts for individual owners for this item or event, enter the wording you would like to appear on it in the text manager. If no receipt is to be generated, leave this blank.
d) The Status dropdown should be set to Active unless it is not intended to continue past a particular date or has become defunct. To deactivate a type or event from showing in the drop down box completely, set this box to Finalise. If you need to get final numbers but do not want any more records created, set it to Finalise and inactive.
e) If the event is to be held on a specific date only you can set it to show using the Event Date feature. If it is to be an ongoing or reoccurring service, then leave this field blank.
f) If the item or event involved microchipping and the chip numbers need to be sent to partner companies such as Home Again or HomeSafe ID and appear on relevant microchip reports, mark the box Is this for microchipping? Marking this box will make the Microchip field on the Animal Details page mandatory when entering this particular item or event and ensure the details are sent to third-party sites such as Home Again or HomeSafe ID.
g) If details for an alternative contact are required in case the owner is unreachable, check the box marked Alternative contact details required? This will make alternative details mandatory when entering this particular item or event.
h) If this item or event is one where you intend to issue your own identification tags to all animals involved, check the box marked Shelter Tag (this will reflect the name of your shelter, e.g. SPCA Tag). Checking this box makes this tag field mandatory on the Animal Details page.
i) If the event is a medical one, you can check the box Prompt for Vet Treatment to remind users to enter the details of any vet treatments added as they enter the animal’s information.
j) If you would like Shelter Buddy to take you to a receipt screen so money can be taken, recorded and printed out with the verbiage entered in step D, check the box Create receipt for this ID type. If you do not need a receipt, leave it unchecked and after the animal’s details have been entered it will remain on the Animal Details Page. 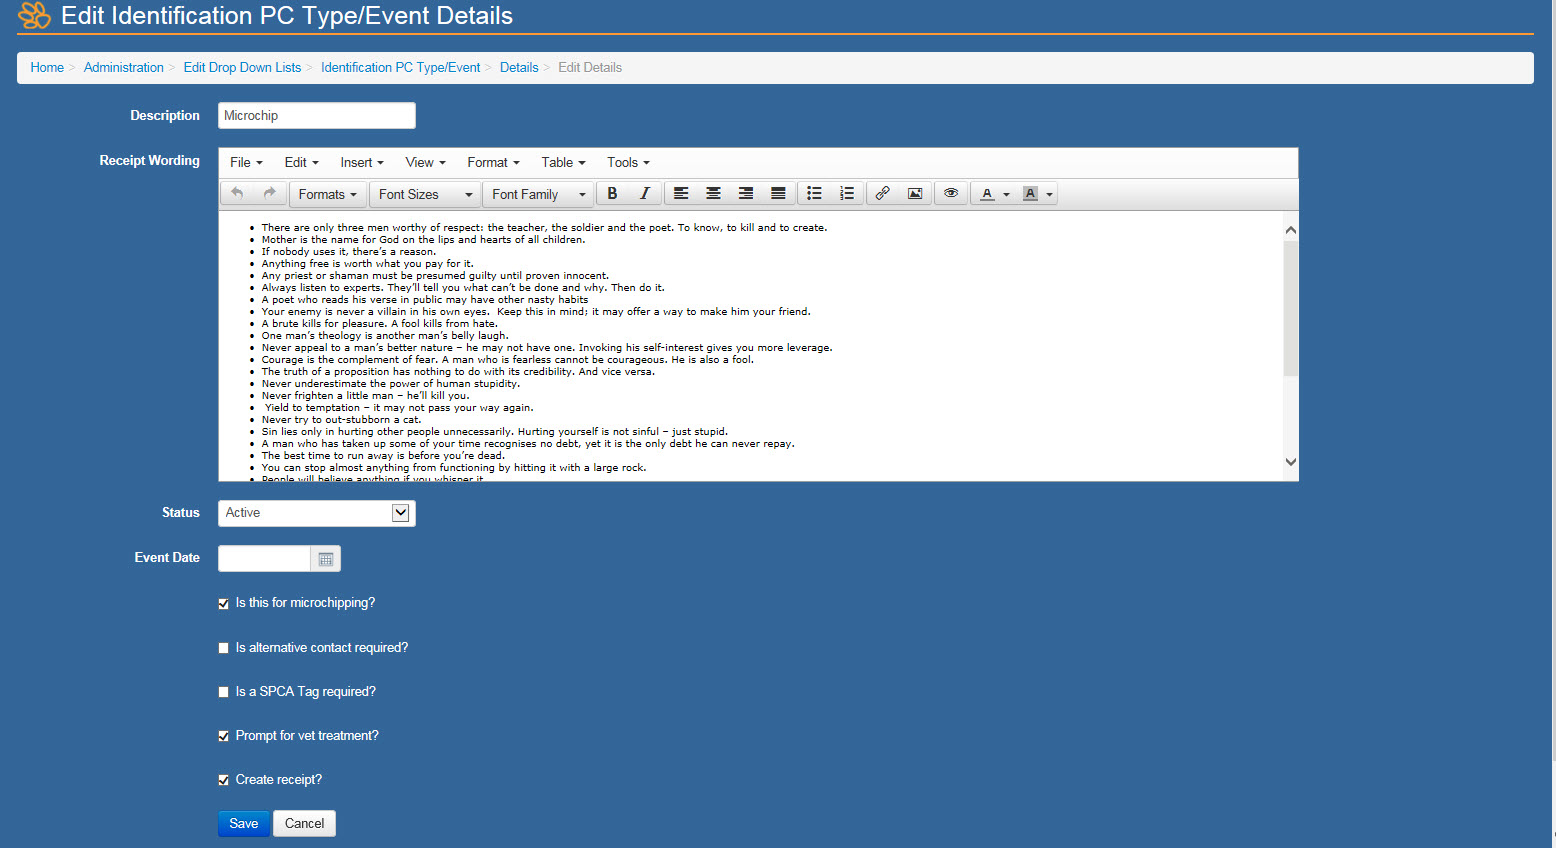
NOTE: if your site is enabled for Digital Signatures and you would like these forms to be signed digitally also, enter the following text EXACTLY at the bottom of the form text where you would like the signature to appear: %%SignedDocuments%%
k) Click the Save button to save the Identification Type or Event.
4) If you return to the Administration page (Administration > Edit Drop Down Lists > Identification PC Type / Event > Maintain) you will see a list of all the events or ID types set up thus far, along with all their settings. You can edit or delete these types from this page if you need to.
Part Two - Entering Identification & Services Animals:
Once the Administration side is set up, you can begin to enter animals via the Identification & Services Personal Category found at the bottom of the Person Details page.

This link will give you four options:
1) New Animal:
a) If you click this link it will take you to an abbreviated version of the Animal Details entry page. The Source and Status will always be Identification & Services and Information in that order. You can assign a Region as appropriate for the event or for your login site – this is manually set so people from any region can enter data for an event that may have taken place in a different region.
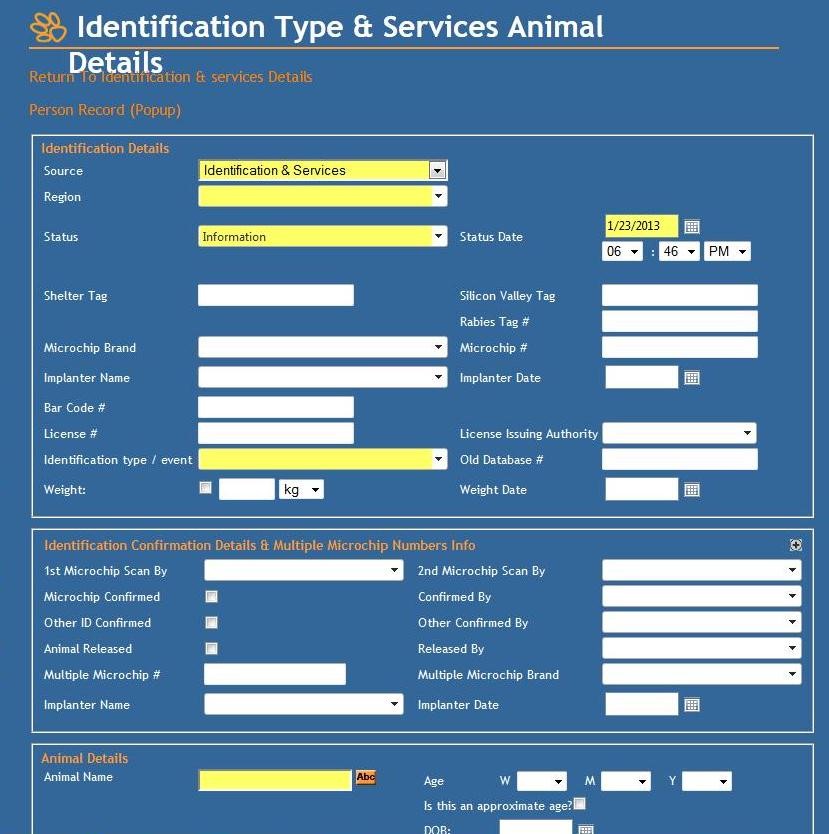
b) The top section of the page is where you can enter any identification details, including shelter-offered identification tags, microchip information, registration numbers (for records only – not for licencing!) and even the weight of the animal.
c) A compulsory field in this section is the Identification Type/Event dropdown which will display anything set up via the procedure described above and dictate which fields become mandatory. This tells Shelter Buddy how to handle the information once the page is complete.
d) There is an option to record a second microchip or identification if required.
e) The middle section records the animal’s personal details e.g. name, type, breed, age, colour, gender etc. Certain fields on this page are generally mandatory and most fields have auto-complete functions.
f) The final section gives you the option to record the jurisdiction the animal came from and add a special message if required.
g) Click Add Animal to finish and depending on the settings for that type of event or ID, you will either be taken to a regular Animal Details page and prompted for vet treatments, alternate contacts or it remains static. If set for Products & Services, it will take you to a new page where vet notes, fees for the identification, service or event and/or additional products and services can be added. Click the Continue to Receipt button once all products have been entered or if you have none to enter, to continue to the receipt page.
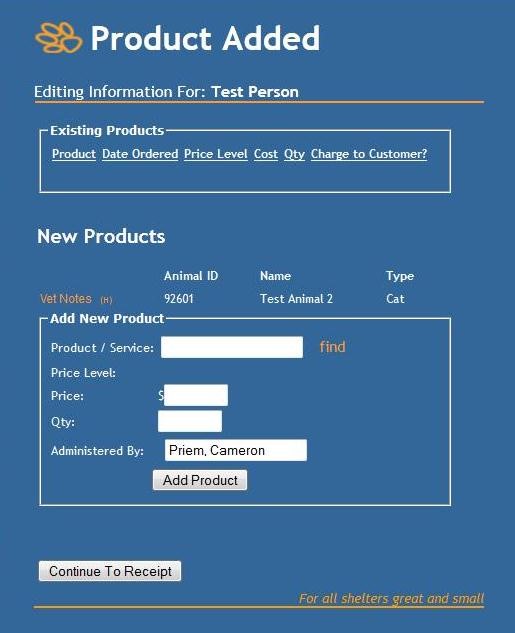
h) The page will then proceed to a receipt page. Complete the receipt as for any other receipt and either Update Receipt to return to the Animal Details page or Update and Print to get a printable receipt. This will finalise the process.
2) Existing Animal:
a) If you click this link, you will receive a search page to search for the existing Animal Details page for the pet you want to update for this event.
b) Once selected, Shelter Buddy will take you to the same abbreviated version of the Animal Details page as above, but any information that can be auto-filled from the existing record (e.g. name, age, breed, gender) will already appear.
c) The Identification Type / Event field will still be mandatory
d) The jurisdiction box will clear and remain mandatory in case the animal has attended from somewhere other than its last recorded location.
e) Aside from those differences, this page will now behave in exactly the same manner as described above.
3) Transfer Animal Details To New Owner:
a) This process links an existing animal to this person as a new owner. To do so, follow these steps:
i) Click the link to arrive at a search page and search for the animal’s existing file.
ii) Confirm the animal showing is indeed the one you wish to transfer.
iii) This will take you to the Animal Details page. Simply click “Update” to attach the animal to the new owner and complete the process. The source and status will remain the same.
4) List Existing Animals:
a) This link will show you in a table all animals currently considered in the care of that individual.
Reporting
"Identification and Services" Process has two reports dedicated to it:
Report 671 "Identification Type & Services Report - Detail"
Report 670 "Identification Type & Services Report - Summary"
Files where the Is this for microchipping? option was marked will also appear on reports:
633 "HomeSafe ID Export"
572 "Microchip Implant Report"
379 "Microchipped Animals Report"
Comments