

First, try and get as much information as possible about the person dropping off the stray. Try to get a driver’s license. If that fails, try to get a name and phone number. Only as a last resort should you enter a stray animal from an anonymous person.
- Check to see if the animal has ID or a microchip. Be sure to search the system to see if the animal already exists. If the animal is found in the system, note the Animal ID number.
- If you have at least the name of the person bringing in the stray, do the following:
- Search for the person.
- If found, skip to step #4.
- If not found, click on the Create a New Entry link or click on the New Record link in the orange menu to the left of the screen (if enabled for your site).
- Fill in the relevant blanks on the Add New Person Mandatory fields: first name, last name, residential address, mailing address if different than residential, telephone number, and gender. Depending on your organization you may be required to confirm identification and include date of birth.
- Click Update Details.
- If you have no information about the person bringing in the stray, access the Edit Person Details page that has been set up as Last Name: Anonymous First Name: Person. You should be able to access it from the Add New Person page via the link at the top left Click here for Anonymous Person *This procedure may differ at different locations. Be sure to double-check with the manager.
- On the Edit Person Details page, click on the Scroll To Bottom link in the upper left-hand section of the screen and then click on the Stray link in the Personal Categories
- On the Stray page click on the Add New Stray Animal *
- *If the animal is already in the system on the Stray page click on the Enter an Existing Animal
- *On the Animal Search page enter the Animal ID in the Go To Animal ID Click View.
- Complete the following (All Yellow fields are mandatory and may or may not be listed below):
Identification Details
- Status: click on the down arrow to select the appropriate status for the animal. The most common will be Stray Hold, ID Trace or Bite Quarantine.
- If the animal has any Identification on it should be filled in at this time. The ID Checked field should always be populated to confirm that there is no ID on the animal if all fields are blank.
- There is an area for the confirmation of Microchip numbers as to their existence in the animal or not under Identification Confirmation details. This is the light blue area just under the Identification area on the system and is optional.
- Sub-Status: if applicable, click on the down arrow to select the appropriate sub-status linked to the main status. Make sure the date and time are not prior to the main status.
- If the sub-status is one that will follow the animal through applicable main status changes, check the box Lock that appears just beneath it to lock the sub-status in place and prevent it clearing if the next main status is also linked to it.
- Other Identification / Tattoos: This text box appears on search returns for lost and found, so anything extremely distinguishing (e.g. identifying tattoos, missing limbs, leg bands for birds, other noteworthy elements) should be briefly mentioned here for quick reference. They can be expanded upon in Distinguishing Features if required.
- Shelter Tag / Band: Depending on your local protocols, you may be required to enter a tag number here to identify the animal while in care.
- Microchip fields: It is always good practice to scan stray animals for a microchip as early as possible. If found, record the details here and remember to tick the Previously Microchipped box located adjacent to the ID / Microchip Checked dropdown.
- Licence / Registration details: If the animal is wearing a licence/registration tag, details can be recorded here. Please note:
- Current License/Registration Details is governed by data entered via the license/registration process and cannot be altered or amended from this page.
- License/Registration Found on Animals will be collapsed on sites that routinely use the license/registration process. Click the (+) at the end of the header bar to open the fields where you can record the tag number, license/registration issuing authority, and expiry date if required.
- ID / Microchip Checked: this field may be mandatory depending on your local settings. Click the down arrow to choose the appropriate option.
Animals Details
If the animal had an existing file, most of the below will already be entered. Check it for correctness in this case.
- Class: The selection from this list will determine the Type. DOMESTIC will default and should be used for cats, dogs, puppies, kittens and birds. For small pets, such as mice, change this to Pocket Pet or Small Animal (depending on local settings). For unusual pets, such as snakes, change this to Exotic. For farm animals, such as goats, change this to Livestock.
- Type: The Type list is driven by what is selected in the Class Click on the down arrow to select the type of animal this is. EX: dog, puppy, cat, etc.
- If cat or kitten is selected the Feral field may become mandatory, depending on local settings.
- Breed/Species: The Breed/Species list is driven by what animal Type is selected. Type in the first three letters of the animal’s primary breed and Shelter Buddy will offer auto-complete selections that match. Click on one to select it. If the animal is a mixed breed, select the breed the animal primarily looks like. If Shelter Buddy was unable to match your suggestion, a link will display next to the text box No Matches Found. Click here to search. Click the link and a pop-up menu will display with a list of entries to choose from.
- Mixed Breed: This will default (usually to Mixed) depending on your local settings. Make sure the correct option is visible, amend if required.
- Secondary Breed: If a second breed is obvious, or would better describe the animal's physical appearance, enter one in the same manner as the first.
- Age: You may be required to estimate the animal's age, depending on your local settings. Either apply an approximate Age Group from the drop-down or enter an approximate age by selecting from the Weeks, Months, Years dropdowns. This will automatically set an approximate Date Of Birth from which Shelter Buddy can calculate the animal's age ongoing. If the exact Date of Birth is known, click the Calendar icon to select it. When you update the page, it will automatically calculate the Age from this.
- Spayed / Neutered (Desexed): If possible, check if the animal is entire, or has been spayed or neutered and click the down arrow on the drop-down to select an option. If the animal was spayed or neutered prior to entering care, make sure the Previously Spayed / Neutered (aka Previously Desexed) checkbox has been ticked to indicate this.
- Gender: Click the down arrow to select the animal’s gender.
- Circumstance: Click on the down arrow and select either Stray (With ID) or Stray (No ID). *The stray hold time may differ if the animal comes in with ID.
- You may need to also select an option from the Animal Received filed to the right of the Circumstance drop-down list, depending on your local protocols.
- Primary Colour: The Colour list is driven by what animal Type is selected. Click on the down arrow to select the animal’s primary colour. This should be the colour that covers the majority of the animal and/or the first one the eye notices.
- Secondary Color: The Color list is driven by what animal Type is selected. Click on the down arrow to select the animal’s secondary colour. This is usually indicative of markings and lets users know later, during lost and found searches, that the animal has further details that need to be considered when making a match.
- Size: Again, this may be mandatory depending on local settings. Size should be relative to the animal's expected adult size, and in comparison to other animals of the same species (e.g. a Maine Coon kitten may be "small" compared to a horse, but will be Extra Large when it grows up and compared to other cats, therefore should be entered as "Extra Large").
- Distinguishing Features: This field is VERY important! Record any patterns on the animal, missing appendages, any scars, tattoos, pregnant, on heat, any injuries, shaved patches etc. Having no distinguishing features is a feature in itself so indicate this if that is the case. This field makes the animal an individual. The dropdowns beneath it represent the qualities most commonly used to describe general animal features, use as required.
- Evaluation Category: click the down arrow to make a selection. This may be mandatory depending on your local settings, or it may not be required. Follow your organisation's protocols.
Status Details
- Due Out In (days): If the date that defaults in the Due Date Out field is incorrect, enter the correct number of days the animal is to be on their stray hold in this field to change it.
- Due Date Out: Use the Due Out In (days) field to add or override a date.
- Date In/Found: Today’s date will default. Click on the Calendar Icon to select the date if this is incorrect. This is the date the animal was found by the finder and therefore may be earlier than the date it was presented to the shelter as a stray.
- Lost/Found Address or Location: Enter the street address where the animal was found. If there is not an exact address, enter a description. EX: “Southside of Lincoln Park near the swings” or “near the cross streets of Main Street and Park Avenue”.
- City/Suburb: Type the three or four letters of the city name and click Find City (Suburb). This will display a pop-up menu that will display ALL cities within the selected state beginning with and containing the one to four letters in the order typed. (*Note: In some cases, some cities may show multiple times. Select the one that displays the appropriate state and zip code to the right.) Click on the appropriate city to select it.
- Zip Code / Postcode / Postal Code: This will default once you have selected the city. If this zipcode is incorrect, go back to the City: field, search and select the correct city that displays the correct zip code.
- Jurisdiction: Click on the down arrow and select the correct jurisdiction if this does not default.
- Shelter Location: Click on the down arrow to select the appropriate location the animal will be placed in within your shelter.
- If known, click on the down arrow and select the kennel number of the kennel the animal will be placed in. If not known, this can be done after the animal has been placed.
- Date In Shelter: This is the date the animal was actually brought into the shelter. Today’s date will default. Click on the Calendar Icon to select the date if this is incorrect
- Scroll to the bottom of the screen and click Add Details.
- This will take you to the Receipt Type Click on the Receipt for One Animal link and go to step #8 or click on the No Receipt * link which will return you to the Edit Animal Details page.
- * If No Receipt is selected, the process is complete.
- The Add Receipt page will display.
- Payment Method: Click on the down arrow to select Free of Charge. *Generally there is not a fee for admitting a stray; however, this may differ at different shelters. This page is displayed so that donations can be entered if required.
- If the digital signature module is enabled, there will be a section towards the bottom of the screen prompting you to have your customer sign the pad: Select your option as applicable
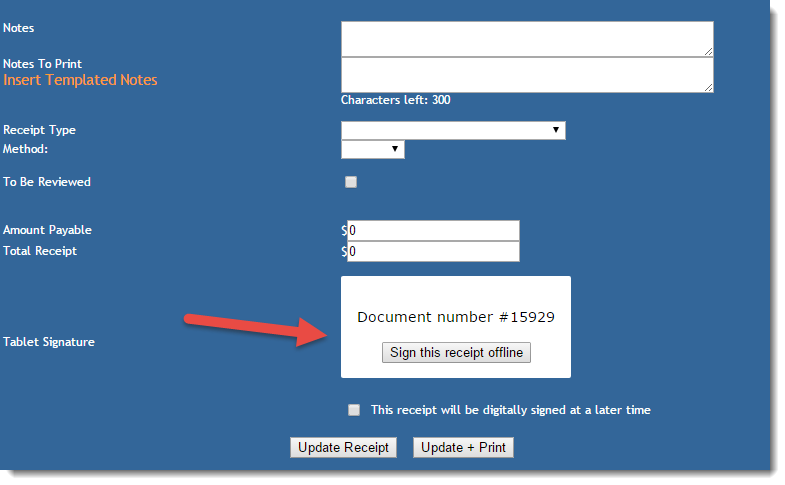
- If signing digitally, look up the Document Number on the tablet:
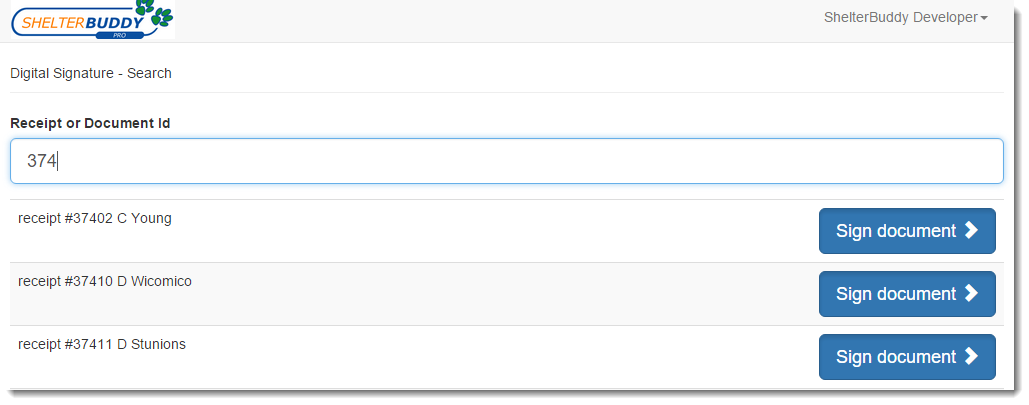
- Pass the client the tablet to sign:
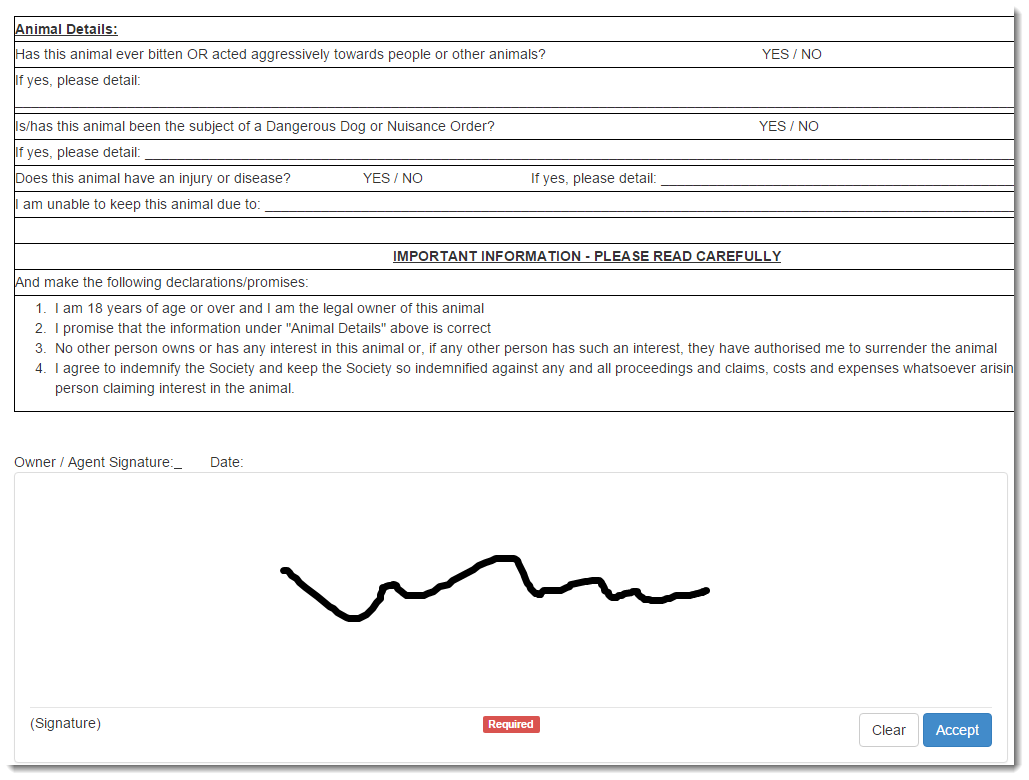
- Click Accept. Only after this has been done will the Finalise signature option be enabled:
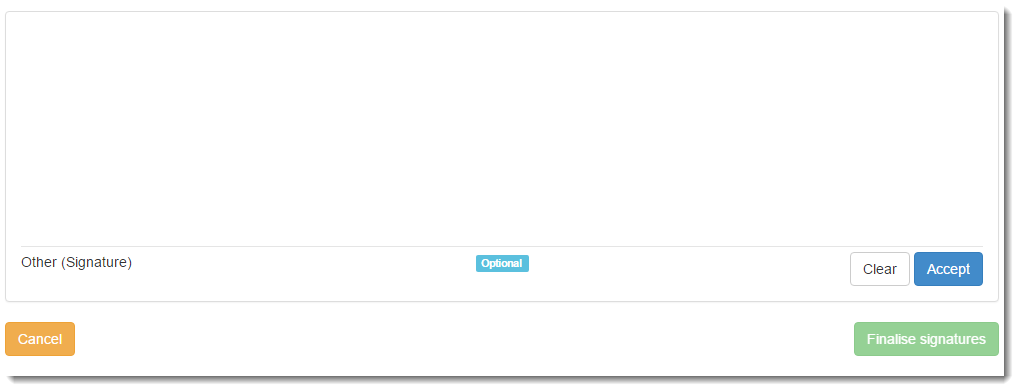
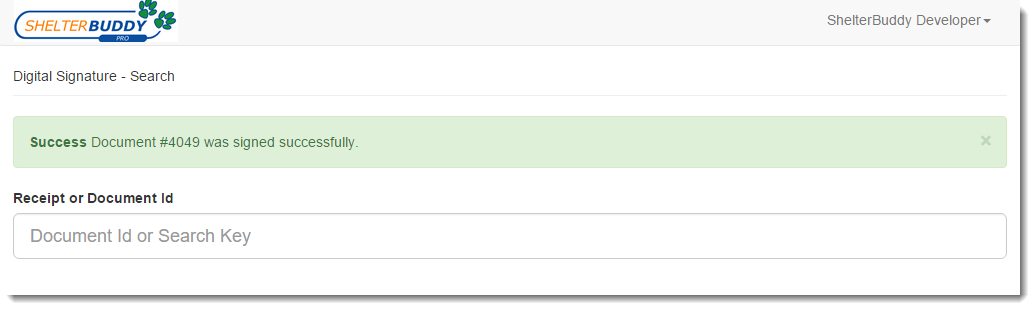
- A success message should display:
- Click Update + Print.
- Print a hard copy of the receipt for your client, and another for yourself if required. They will print in PDF format and the final signature will look something like this:

- Stray forms can be emailed to clients for sites that are working towards a paperless office.
Don’t forget to:
- Take and upload a photo of the animal.
- Enter vaccinations, tests and treatments if administered at the time of intake.
- Print out a Kennel Card to be placed on the kennel where the animal is placed.
- Add any applicable notes to the General Animal Notes link in the Animal Menu on the right side of the Edit Animal Details
Assign a kennel number to the animal once they have been placed, if it has not already been done
To enter Multiple Incoming Stray Animals:
Follow the identical steps as above to #5, then follow these steps:
- Complete the Identification, Animal and Status Detail sections as described above, then click the Add Animal button.
- Select Receipt for Multiple Animals
- On the resulting page, complete the following:
- Enter Animal Quantity: This is the remainder of the animals you need to enter, not the number in total. E.g. if you are entering a litter of 3 kittens, the number entered here should be 2, because you have already entered the first one.
- Type: This will default to the same as the original animal, however, you may change it to the corresponding adult/baby type for that species (e.g. if the first animal is a Cat, you can make all subsequent records Kittens but you would not be able to make them Dogs).
- Gender: defaults to the same as the original animal. Amend if the subsequent animal(s) are of a different gender.
- Primary Colour: default to the same as the original animal. Click the down arrow to adjust if required.
- Secondary Colour: default to the same as the original animal. Click the down arrow to adjust if required.
- Circumstance: defaults to the same as the original animal. Click the down arrow to adjust if required.
- Feral: will default to the same as the original animal. Click the down arrow to adjust if required.
- Copy the above information to all new animals: if all the subsequent animals are identical to the details you've just completed, then make sure this box is ticked. This will duplicate the original details exactly onto the subsequent animal files. If each animal is significantly different, untick this box.
- Click Multiply Animals
- If the Copy the above information to all new animals box was unticked, a pop up to deploy that allows you to amend the above details individually for each subsequent animal one at a time until all are complete.
- Popup Window: You will see a mini window pop up and the main page behind it will say Loading… Once the page is loaded the main window will then go back to the original Edit Animal Details page which is the first Animal ID on the popup window in orange.
- This function automatically assigns each animal with an Animal ID. The mini popup window is the link for you to use to go into each animal record and add all of the specific details for each individual animal. It can be minimized to the desktop toolbar at the bottom on your screen until you are ready to complete the details of the remaining animals. To view the mini window: locate it in your bottom toolbar and click on it or toggle to it (hold the ALT key down and press TAB) *.
- *If the mini popup window is accidentally closed, on the main window, in the Animal Menu on the right-hand side of the screen, click on the Reload Multiple Animal Popup. This feature will only function until another multiple animal pop up is created on the same computer.
- The first Animal ID number link is assigned to the animal record you have already completed. Subsequent Animal ID numbers are assigned to each animal created in turn. Use the links to change any further information unique to each individual (e.g. distinguishing features).
- Once you have updated all of the animal records to reflect each individual animal, go back to the mini popup window and click on the Kennel Card link. This will change the main window to display the kennel cards.
- You will notice there is a separate card for each animal, scroll down to view each.
- Click on the Print Kennel Card link to print all of the Kennel Cards displayed.
- Click on the Save Kennel Card link to move the Kennel Cards to each applicable animal record automatically.
- Once you have printed out and saved the Kennel Cards, bring up the mini window again and click on the Stray Receipt link.
- You will notice that this link actually disappears and the main window displays the Add Receipt page.
- At this point, you can close the mini popup window by clicking on the Close Window link.
- As a safety, the system will ask you if you are sure you want to close the mini popup window, click OK.
- The Add Receipt page will display.
- Payment Method: Click on the down arrow to select Free of Charge. *Generally there is not a fee for admitting a stray; however, this may differ at different shelters. This page is displayed so that donations can be entered if needed.
- Click Update + Print.
- If your site is set up for digital signatures, have your client sign now and print a copy of the form for them (see above for more details). ShelterBuddy will automatically save a signed PDF copy of the form as a stray receipt on the animal’s page for your reference if required.
- If you are NOT set up for digital signatures, print two copies of the receipt and have the client sign your copy.
- Stray forms can be emailed to clients for sites that are working towards a paperless office.
Don’t forget to:
- Take and upload a photo of each animal.
- Enter vaccinations, tests and treatments if administered at the time of intake.
- Print out new Kennel Cards after photos have been attached.
- Add any applicable notes to the General Animal Notes link in the Animal Menu on the right side of the Edit Animal Details page.
- Link the animals if they are part of a litter by using the Create Litter link in the Animal Menu on the right side of the Edit Animal Details page.
- Assign a kennel number to each animal once they have been placed, if it has not already been done.
Entering Stray Animals with Existing Files:
This is how to bring an animal into the system that is stray, but the animal already has a known existing Shelter Buddy File.
- Complete steps 1-4 as above. Be sure to make note of the existing Animal ID number.
- On the Edit Stray Details page click on the Enter an Existing Stray Animal link.
- On the Animal Search page enter the Animal ID in the Go To Animal ID field. Click Add Stray.
- If the file was previously a Found file and the status is still “Found”, you will see an additional pop up asking you to select a “closing” status for the found file e.g. Entered Care.
- From the pop-up, select the appropriate “closing status”
- Select the appropriate date/time for the closing status

- Once you click Save to proceed, the pop up will close and you will see the same screen as before only the status will have amended:

- Enter the new IN CARE status e.g. Awaiting Sort to proceed as normal.
- From here, complete the Identification Details, Animal Details and Status Details as above to proceed to the Receipt Page.
- Complete the Receipt Page as detailed above to finish.
Don’t forget to:
- Take and upload a current photo of each animal, especially if the existing photo is from when the animal was significantly younger or looks different to now.
- Enter vaccinations, tests and treatments if administered at the time of intake.
- Print out new Kennel Cards after photos have been attached.
- Add any applicable notes to the General Animal Notes link in the Animal Menu on the right side of the Edit Animal Details page.
- Link the animals if they are part of a litter by using the Create Litter link in the Animal Menu on the right side of the Edit Animal Details page.
- Assign a kennel number to each animal once they have been placed, if it has not already been done.
Comments