In order to give sites more control over the information recorded through statuses, and to allow for local processes that may not translate to other sites, users can set up Sub-Statuses. These can be used in conjunction with regular statuses to communicate more information about an animal’s progression than a regular status can impart alone.
The Status should mark the animal's journey through the shelter. These cannot be customised or added to.
The Sub-Status can mark short or long term events, and can be as custom to your site as you need them to be. They will work with any status.
To create a New Sub-Status:
You must have access to the Administration menu to perform this function.
- Go to the Administration link in the left hand Orange menu.
- Find the link Edit Drop Down Lists and look for the heading Sub-Status. Click the Maintain link next to it.
- On the following page, click the button Add New Sub-Status
- Give your new sub-status a name of up to 50 characters including spaces.
- Select from the Statuses box which regular statuses this sub-status should display for by clicking into the box next to each applicable status
- When all statuses have been selected, click Save to create your sub-status.
- Your new sub-status will now appear in the sub-status list, with each selected status displayed against it and a Yes/No indicator to show if it is currently active or not.
To Edit or Change a Sub-Status:
- Go to the Administration link in the left hand Orange menu.
- Find the link Edit Drop Down Lists and look for the heading Sub-Status. Click the Maintain link next to it.
- On the following page, find the heading for the sub-status you would like to edit and click on it. This will open an edit page.
- From here, you can rename the sub-status, amend the selection of main statuses it’s linked to, and flag it active or inactive.
Using Sub-Statuses:
- From the Welcome / Search Page, enter an Animal ID number, Shelter Tag number or other searchable fields to find an animal’s page.
- Beneath the status file, you will see a link marked Edit Sub-Status. Click the link to open a dialogue to add sub-statuses.
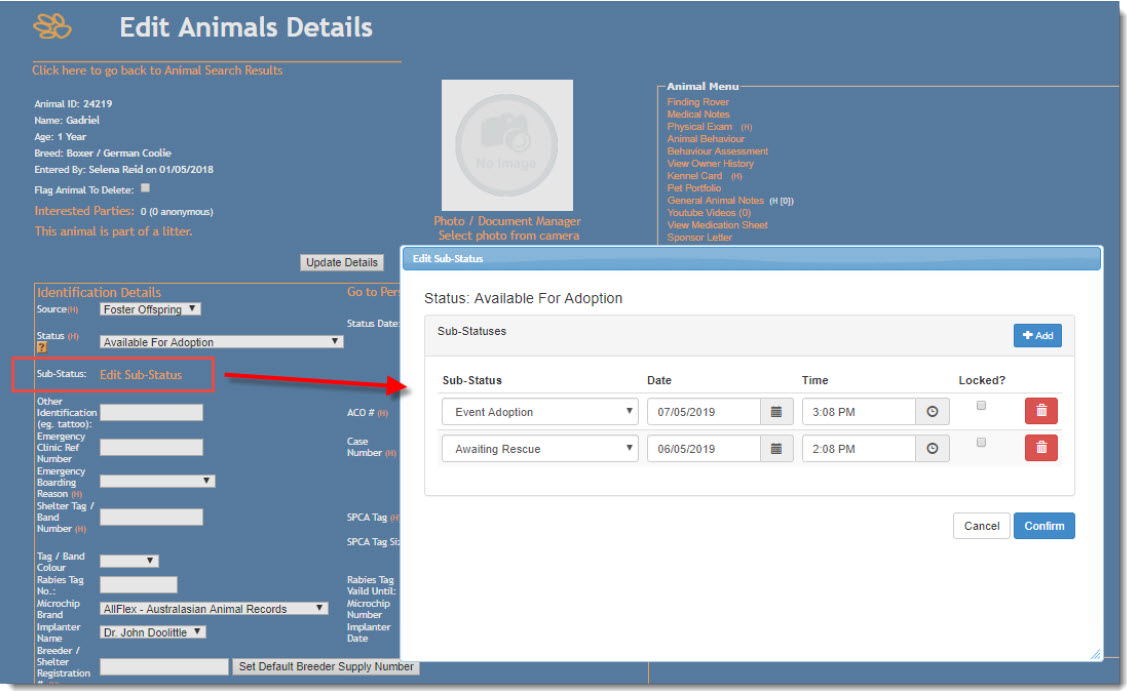
- Click the +Add button to add new statuses or the red trashcan to remove them.
- The date and time stamp will auto-allocate to the current date and time.
- You can lock the sub-status by clicking the box in the column marked Locked? NB: locking a sub-status means that if the main status changes and the sub-status is also available to the new status, the sub-status will not be cleared but will remain linked to the new status also.
- If you need to backdate the sub-status date, you may do so, but if you enter a date or time that is before the existing main status date, or the source date, and then click “update” you will receive a pop up validation error message to alert you to the issue and asking you to try again. Your changes will not be saved in this case.
- Click Confirm to add the statuses.
- Update the page to save the statuses.
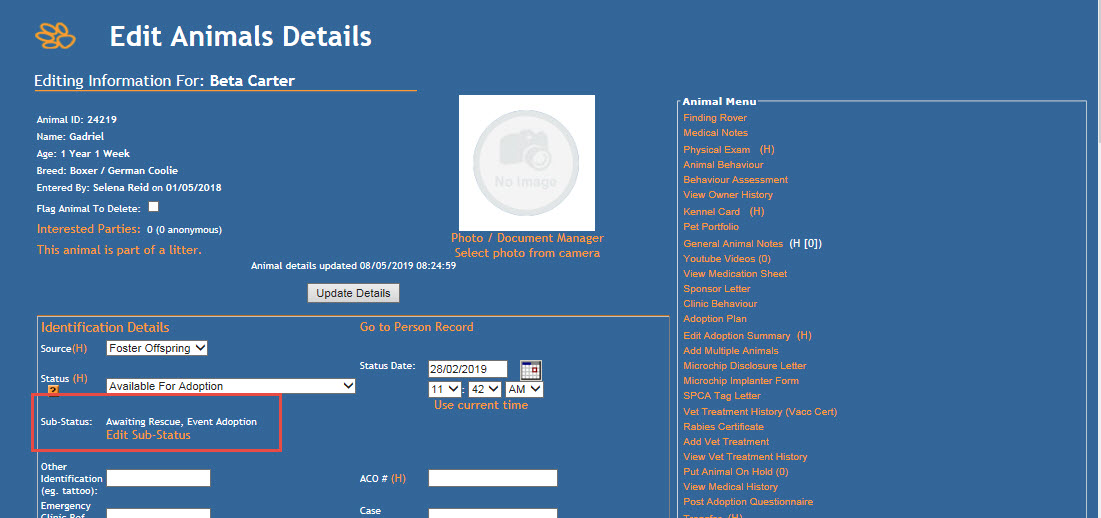
PLEASE NOTE; YOUR SUB-STATUSES MAY LOOK AS THOUGH THEY HAVE SAVED BUT THE CHANGE IS NOT PERMANENT UNTIL YOU CLICK THE UPDATE DETAILS BUTTON. - Just as with normal statuses, you can apply additional sub-statuses after the first one to indicate progression through in-house processes (e.g. Vet Checks > Behaviour Assessment > Spay Neuter surgery). To do this, click the Edit Sub-status link beneath the sub-status to re-open the dialogue box and make your changes.
- To view the sub-status in history, click on the (H) history link next to the main Status drop down.
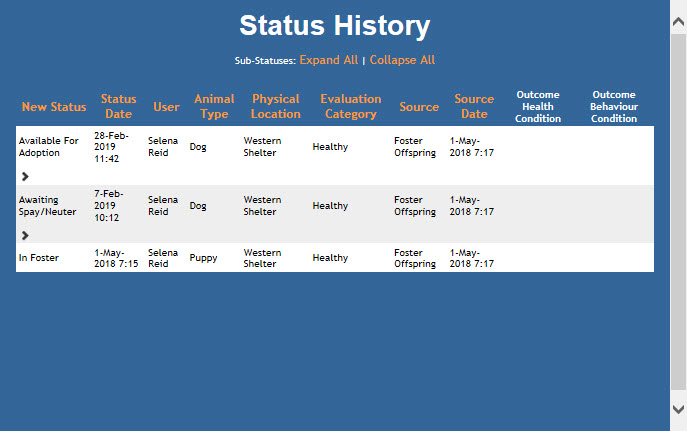
- In the resulting pop-up, click on the > arrow to expand the sub-status information and view any sub-status history linked to that status.
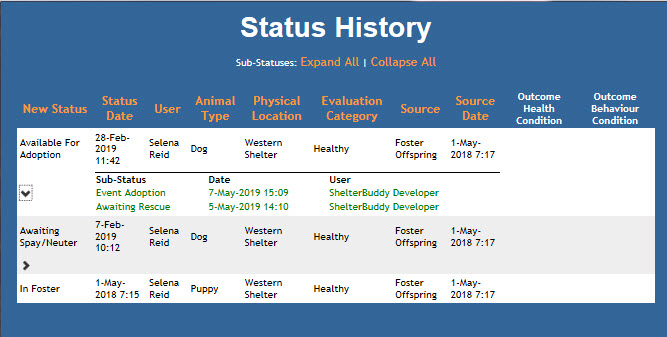
- A Green sub-status row indicate the sub-status is current. Sub-statuses that are historical only will appear in black.
- If there is no > arrow visible, this indicates that no sub-status was been assigned to that status.
- When the main status is changed, the sub-status will automatically clear, unless the sub-status has been locked and is available to the new main status.
Editing Sub-Statuses:
If you need to amend or alter sub-statuses that appear historically, this can now be done via the following process:
- Go into Admin > Maintain Status History for Animal and search for the Animal ID in question.
- You will now see options to either Edit or Delete each sub-status stored in history:
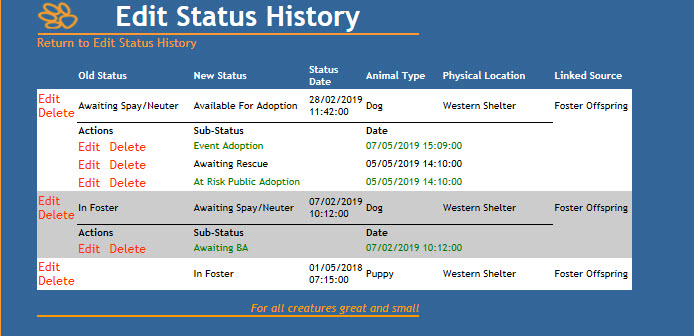
- Click Edit to make a change to the Sub-status selected or the date/time assigned to it. Click Edit Status History to confirm and save your changes.
- Click Delete to remove the status entirely. You will be asked to confirm you wish to do this action: click ok to confirm.
- Note: you cannot alter the order in which the sub-status appear or whether or not they are currently selected - you may only change the sub-status, it's assigned date and time.
Searching for Sub-Statuses via the Search Page:
- From the Welcome / Search Page, click the link for the Advanced Animal Search.
- Select your main status. You must select a main status that has sub-statuses linked for the sub-status search drop down to activate.
- Scroll down to find the Sub-Status listed just under the main Status box.
- Select any other search criteria required
- Click Search.
Reporting on Sub-Statuses:
Reporting on sub-statuses is currently available via the following reports:
- In Care Inventory (226)
- Animal Status report (612)
- Outgoing Detail List Report (198)
- Shelter Statistics - Outgoing (10)
- Adopted List Report (196)
- Adopters Report (222)
- Animal Status with Sub Status Report (151)
- In Care on Specific Day (646) - as show/hide field, not a filter
If you require this field to be available on different reports, please notify us either via Zendesk or support@shelterbuddy.com.

Comments