
This feature allows you to set or modify templates for emailing standard forms that have a built-in email feature. Currently, this only allows for Consultation History and Medical History, but it may expand in future.
All sites are equipped with default email templates here. If you are happy with the status quo, then these can remain as they are, or they can be edited to manage your preferences.
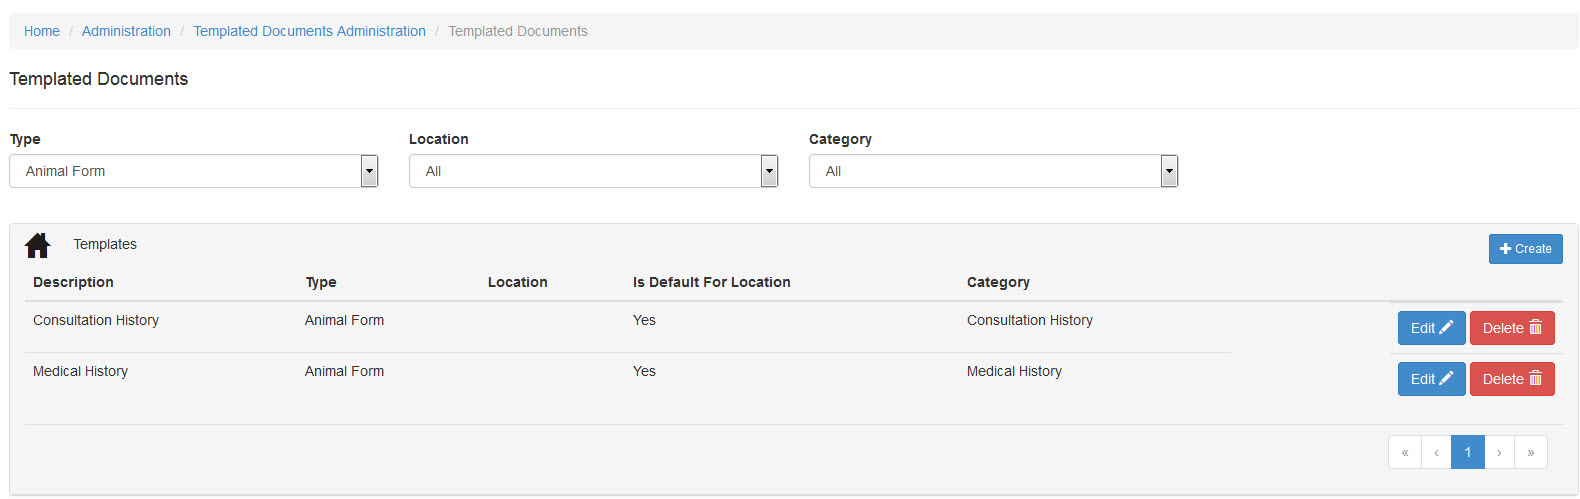
- From the Templated Documents Administration menu, click on the link Animal Forms (Emails)
- You should see two standard templates already in place, one for Consultation History and the other for Medical History.
Create a new template:
- Click on the +Create button
- Location: click on the down arrow to select a Physical Location if the template is specific to just one. Otherwise, you may leave it left at All.
- If you would like the template to be the default for the selected location, click the box Default for location to mark it.
- Description: This free text field enables you to add a name to your template to identify it for other/future users. E.g. if the template is for one specific location, it might be "Campus A Consultation History".
- Type: Defaults to Animal Form. Leave as-is.
- Category: click on the down arrow to select if the template is for a Consultation History or a Medical History form.
- Subject: place your cursor in the text field to activate the drop-down. You can either simply type into this field if the information is to be static, or if you would like it to auto-fill specific information for each client, click on the down-arrow from the drop-down to find available place-holders. Click on a place-holder to insert it into the subject field and do not change the place-holder text once there. This text will be replaced with custom information for each client.
- Body: place your cursor into the text canvas to activate the drop-down. As for the subject, you can either simply type your message, or you can use place-holders selected from the drop-down to customise the information for each customer.
- When your changes are complete, click Save or click Cancel to discard and return to the menu.
- Once saved, the Templated Documents/Animal Form menu will display. Your new template will be visible in the list.
Edit an existing document
- Click on the Edit button for the template you wish to edit.
- Once the new page loads, you may make any changes you need using the drop-down options, text fields, and place-holders.
- When your changes are complete, click Save or click Cancel to discard and return to the menu.
Delete an existing document
- Click on the Delete button for the template you wish to remove.
- A dialogue warning will appear to ask if your sure you wish to delete the document. Click Yes.
- The template will be removed.
Comments