
This process walks you through how to log in to the Online Licensing site for the first time and create your profile.
- From the landing page, click the Sign in/Create an account link in the upper right corner.

- A page will load where you can add your email address and password if you already have an account, or you can create a new account by clicking the Sign up link.
- If you think you have an account already but have forgotten your password, simply click the Forgot your password? link to get back in.

- If you think you have an account already but have forgotten your password, simply click the Forgot your password? link to get back in.
- Clicking the Sign up link will take you to this page:
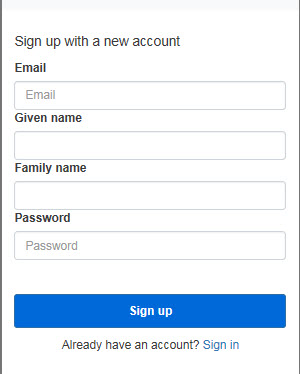
- Email - enter your email address. This is what you will use to log into the site.
- Given name - enter your first name.
- Family name - enter your last name.
- Password - choose a password. The password must contain:
- 8 characters at minimum
- Have at least one capital letter
- Have at least one lower case letter
- Have at least three numerals
- Have at least one non-alpha-numeric character
- Click Sign up
- The site will send a confirmation email to the email address you entered. Once received, click the Verify Email link, then click the Continue button to proceed.
- The Create Account page will display, indicating Step 1. Note that the name fields are already populated.
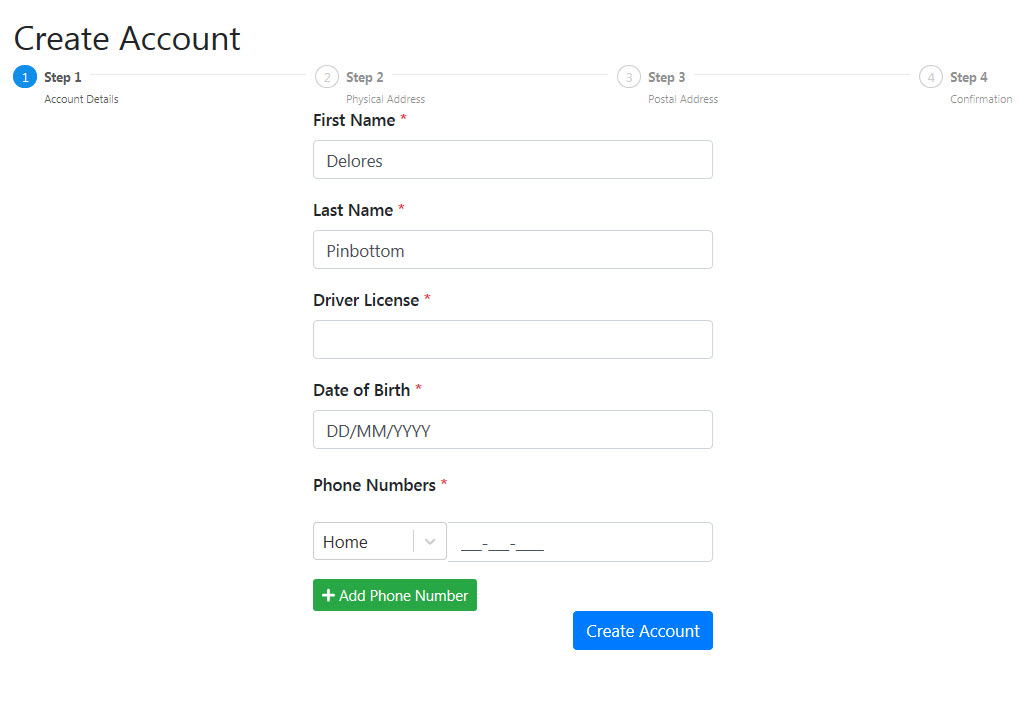
- Fields marked with a red asterisk * are mandatory
- Driver License* - enter your Driver License number.
- Date of Birth* - click into the field to add your Date of Birth. NB: you can either use the calendar to locate the date, or you can simply type it in provided it is formatted to match the display within the text field:
- Phone Numbers* - only one number is required, but there is a facility to add more.
- Select the "type" of number (Home, Cell, Work) by clicking on the down arrow to see the option, then click on one to select.
- Click into the field to type the number. You will note the field turns red at first: it will remain red until you have entered the correct number of digits. If you enter the wrong number of digits, it will show you a little validation message underneath to offer how many digits there should be. The field will turn green when the correct number of digits has been entered and will turn red again if you type in too many.
- You can add additional phone numbers by clicking the +Add Phone Number button.
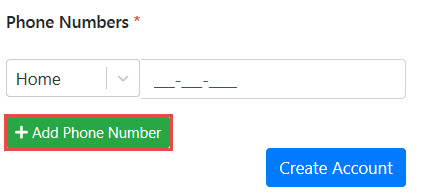
- If you click the button by accident, you can remove the field by clicking the trash can icon at the end:

- When all elements are completed, click the Next button.
- Step 2/Physical address page will load. Click into the Search for address field to type in your address.
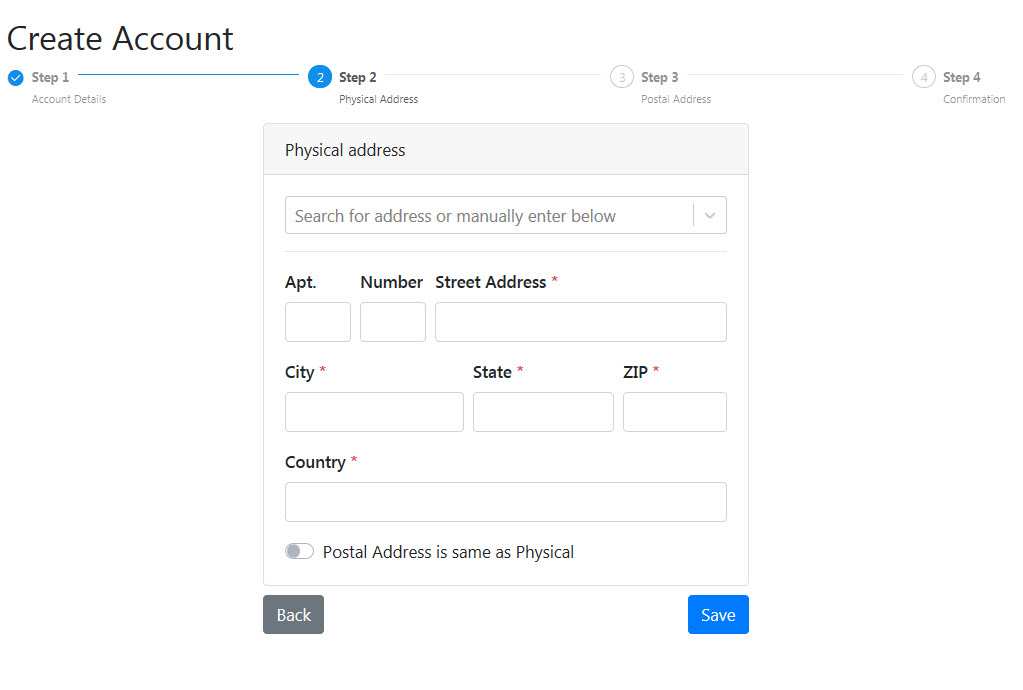
- If you place your cursor in the search field at the top, the page will auto-complete the address as you type: click the option below the search box to select and complete the entry.
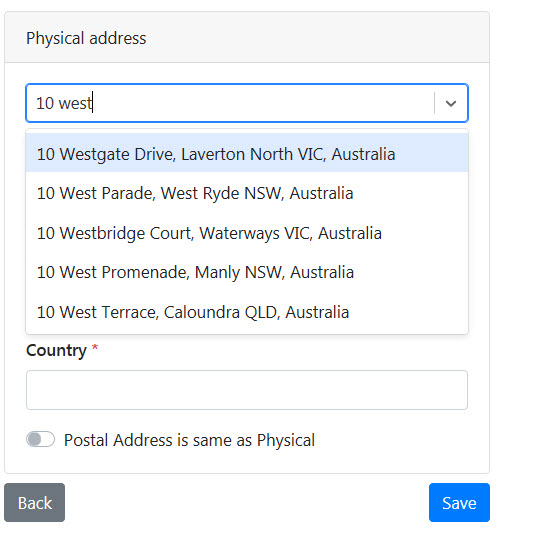
- If your address is not listed, or otherwise cannot be found, you can manually enter the information in the fields below the search box.
- If you place your cursor in the search field at the top, the page will auto-complete the address as you type: click the option below the search box to select and complete the entry.
- If your postal address is the same as your street address, click on the switch "Postal Address is same as Physical" seen in the screenshot above. This will copy the information for your street address to the postal address page and skip Step 3 of the profile creation process.
- If your postal address is different, leave the switch at the default and click the Save button.
- Step 3/Postal address page will load.
- If this is identical to the Physical address, click the box Use Same as Physical Address to copy the information over.
- If it is different from the Physical address, follow the same process for the previous page to add the postal address.
- NB: if you have a Post Office Box, GPO Box or other mailing services, the Apt. and Street Number fields are left empty in this case.
- Click Save to continue.
- Step 4/Confirmation page will load.
- If you agree to have your details disclosed in the case your pet is found by someone so they can speak to you directly, click the "Yes" option. If you would rather remain anonymous at all times, click the "No" option.
- Click a Yes or No option to indicate your preference for inclusion on the Shelter Newsletter mailing list.
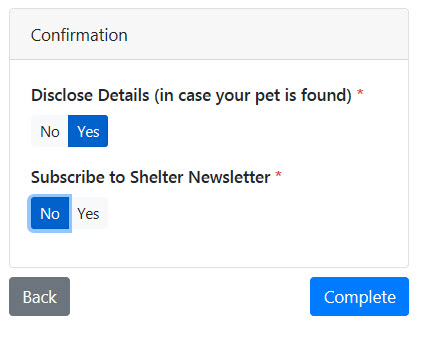
- Click Complete
- The page will give you a summary of the information entered and you will now see new links available at the top of the page.
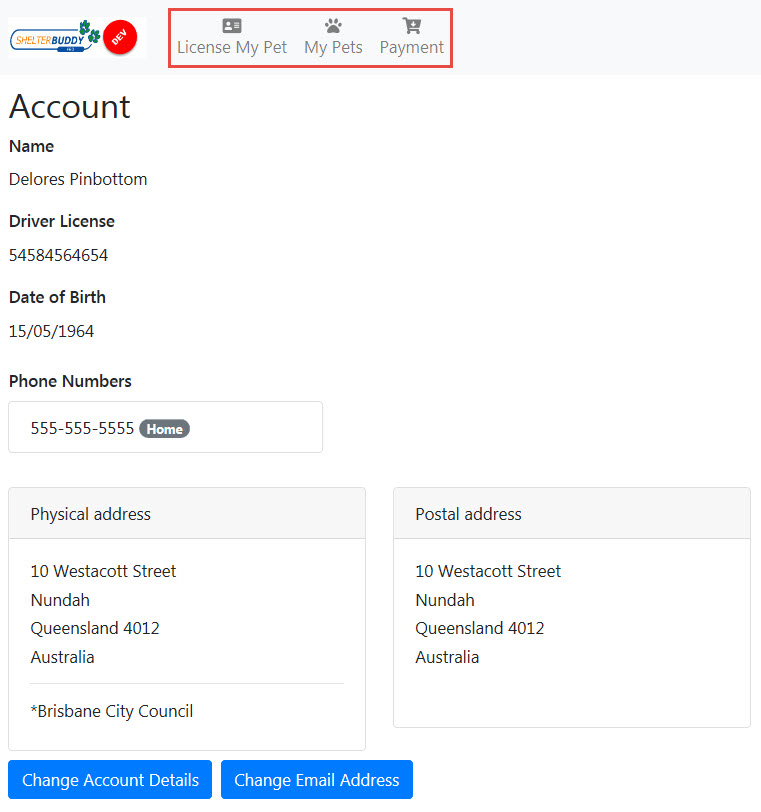
- You are now ready to license your pets.
Comments