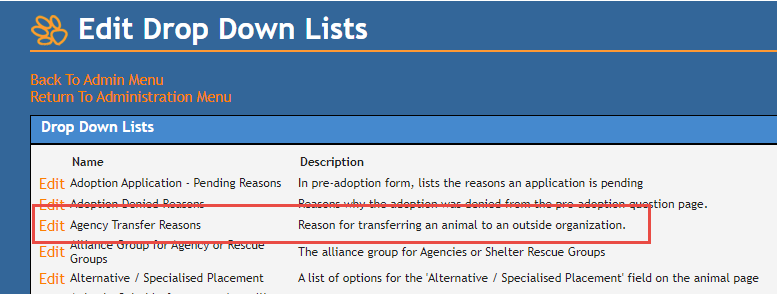
Agency Transfer Reasons assist you in tracking why animals are being transferred to outside agencies and help you keep track of specific programs that may be involved.
To set up Agency Transfer Reasons, you will need access to the Administration menu.
- From the Welcome/Search page, click the Administration link in the orange left-hand menu.
- Click on the menu option Edit Drop Down Lists
- In the DropDown List section at the top of the resulting page, find Agency Transfer Reasons and click on the Edit link.

- A page will load showing all existing items.
To Add a new Agency Transfer Reason:
- Place your cursor into the text field at the bottom of the list and type the new Agency Transfer Reason.
- Note: there is no auto-case here, so make sure you type it EXACTLY as you wish it to appear on the list.
- The Show box will be ticked by default.
- If you would like animals transferred out for this reason to have their microchips forwarded to Home Again, tick the Send to Home Again checkbox by clicking on it.
- Leave this box blank if you do not wish the microchip to be registered automatically.
- Press the Enter key on your keyboard to save.
- The new item will appear in the list above in alphabetical order.
To Edit an existing Agency Transfer Reason:
- Hover your mouse over the reason you wish to edit until a small icon that resembles a pencil appears on the left.
- Click on the pencil icon
- The Agency Transfer Out reason will appear in a text box.
- Place your cursor into the text box by clicking on it and make any changes to the item text that you require.
- If you wish to retire the reason so it no longer shows in the list, click the box in the Show column to remove the tick mark. To reactivate it, click the box so the tick appears.
- To remove the setting to send the details to Home Again, click the box in the Send to Home Again column to remove the tick. To reinstate or activate it, click the box so the tick appears.
- To save your changes, click on the green icon on the right.
- To reject the changes, click the red icon on the right.

Comments