
Manage Pages – Special Cases allows you to restrict access to links and pages that are different to normal pages. E.g. you can restrict Report Groups, a Person’s file, a specific Animal’s file or different areas on the Animal Details or Person Details page. It is used for any pages that contain a query string after the path name, so aren’t eligible to work with the normal Manage Pages function. It is a little more complex than the normal Manage Pages feature so if you require assistance, please contact support@shelterbuddy.com.
This feature is available via the Edit User Access menu. You will need access to Administration functions to perform these actions.
- From the Administration menu, locate and click on Edit User Access, and then from the resulting menu, find and click on Manage Pages – Special Cases.
- The resulting page will display a list of any pages already loaded and at the top of the page will be a link New Page. If the page you wish to restrict is not already in the list, click the New Page link.
- You will be presented with three options:
- Page Type: This drop down contains four options – These options will affect the options that appear beneath them when selected.
- a. Animal should be selected if you wish to restrict a specific Animal Details file.
- b. Person should be selected if you wish to restrict a specific Person Details file.
- c. Report Type should be selected if you wish to restrict a Report Group.
- d. Other Page Type should be selected if you wish to restrict a different kind of page link or pop up that can’t be managed in Manage Pages, e.g. General Animal Notes or the link to a Dispatch job from the bottom of an Animal Details page.
- ID: If you are restricting a Person or Animal file, enter the Person ID or Animal ID number here and click the search link on the right hand end to ensure you have the correct file.
- Description: this text box is used to describe the page you are adding but should only be applied here after the Person or Animal ID number has been selected.
To Restrict an Animal or Person Details page:
- Select the relevant page type from the Page Type drop down (Animal or Person)
- Enter the Animal or Person ID number in the ID text box or click Search to use information other than the ID number (e.g. name or address).
- The page will automatically save this and return to the Manage Pages – Special Cases main page. NO USERS WILL HAVE ACCESS AT THIS POINT
- From the Manage Pages – Special Cases menu, find the page you just added and click the Edit link against it on the right hand side.
- On the resulting page, add a description in the Description field (e.g. person/animal name and/or something to reference why the page was restricted)
- Click the checkbox beside the groups you wish to assign access to and select “All” from the drop down list to assign access to a group. Again, the “Read Only” option has no effect on this page.
- Assign individual users as required by searching for their last name and clicking on their name from the pop up that will appear. Click the Save button to complete.
- If you make a mistake and need to delete the page, locate it in the Manage Pages – Special Cases menu and click the Edit link.
- Remove all users and groups from access until no users are assigned access and click Save to update
- Click the Delete link in the top left of the page to remove the page from the list.
To Restrict a Report Group:
This process will limit access to an entire group of reports from the Reports Menu.
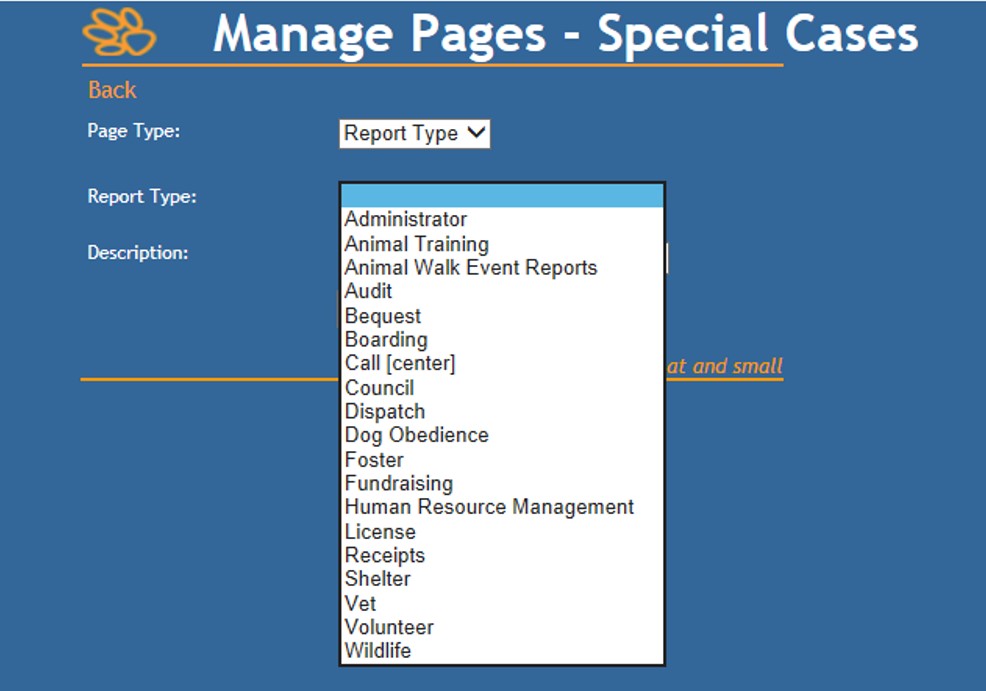
- Select the option Report Type from the Page Type drop down.
- Click on the down arrow on the Report Type drop down list and select the report group you wish to limit.
- Click Save to return to the Manage Pages – Special Cases Main page. NO USERS will be able to access this group now until you assign access.
- Locate the report group you just added in the list displayed on that page and click the Edit link against it to assign access.
- Click the checkbox beside the groups you wish to assign access to and select “All” from the drop down list to assign access to a group. Again, the “Read Only” option has no effect on this page.
- Assign individual users as required by searching for their last name and clicking on their name from the pop up that will appear.
- Once all users and groups required have been assigned, click Save to complete.
- If you make a mistake and need to delete the page, locate it in the Manage Pages – Special Cases menu and click the Edit link.
- Remove all users and groups from access until no users are assigned access and click Save to update
- Click the Delete link in the top left of the page to remove the page from the list.
To Restrict a Different Page Type
- Select Other Page from the Page Type drop down. Beneath it, the options visible will change.
- Page Name: This is the name of the page or link you wish to restrict and often an action you are restricting also, in case the same page/link is restricted for various tasks e.g. General Animal Notes – Delete
- Path: As for any Manage Pages, this is the pathname of the page you wish to restrict. It will begin with the forward slash after the address of your site and end with .asp e.g. /animal/animalNotes.asp
- Querystring: a querystring can describe what you want to do with the page or the type of page it is, e.g. task or job
- Querystring Value: the querystring value will define the specific value of the task, e.g. edit or personAgencyLink
- Querystrings and querystring values can be difficult to determine. If you need assistance, please contact support@shelterbuddy.com
- Description: Enter a description of what the purpose of the page is, e.g. “Allows Users to Edit General Animal Notes”
- Click Save to save your changes. NO USER will have access at this point.
- Locate the page you just saved in the Manage Pages – Special Cases menu and click the Edit link on the right hand side.
- Click the checkbox beside the groups you wish to assign access to and select “All” from the drop down list to assign access to a group. Again, the “Read Only” option has no effect on this page.
- Assign individual users as required by searching for their last name and clicking on their name from the pop up that will appear.
- Once all users and groups required have been assigned, click Save to complete.
- The page should look like this one, set up to restrict the ability to edit General Animal Notes:

- If you make a mistake and need to delete the page, locate it in the Manage Pages – Special Cases menu and click the Edit link.
- Remove all users and groups from access until no users are assigned access and click Save to update
- Click the Delete link in the top left of the page to remove the page from the list.
Comments