
This procedure is used when animals needs to be internally transferred out or transferred into a location. For an animal to be transferred out from one location to another, it cannot be currently in transit (from a previous transfer), or have an exit/outgoing or information status. To determine if the animal is in transit, the status will read “Internal Transfer Out”. Alternately, look in the Animal Menu under the link Transfer to see if the animal is currently in transit. If no reference to the animal’s transit status is mentioned, then the animal can be transferred out. To transfer bulk animals from one location to another, the following steps should be taken.
Note: you must be logged in at the Source location to transfer animals OUT and logged in as the Destination location to receive them in.
Normally, transfers in and out are managed by staff who work at the relevant location, so this does not impede their workflow. However, if for any reason one user has to complete both actions they must have a roaming profile. They will need to log in as the source location to transfer the animals out, then log out and log back in as the destination location to receive them in.
Transfer Multiple Animals Out
In the case that many animals are being transferred to the same place, it is possible to transfer them in bulk instead of one at a time. However, this can also be used for a single animal if required.
- On the Welcome screen, locate the Bulk Updating Menu link in the search menu at the top of the page
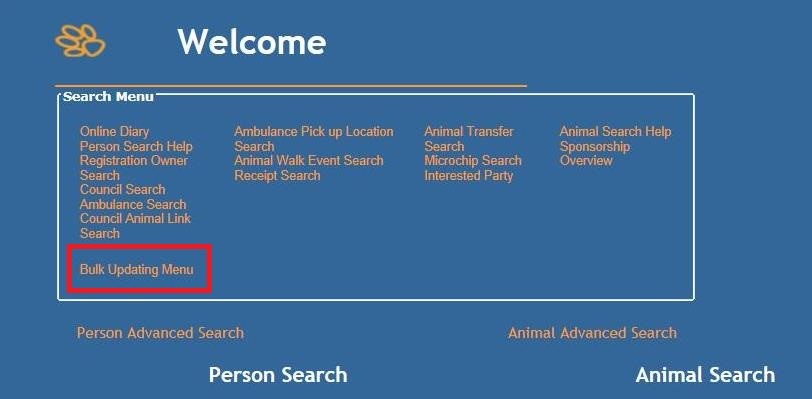
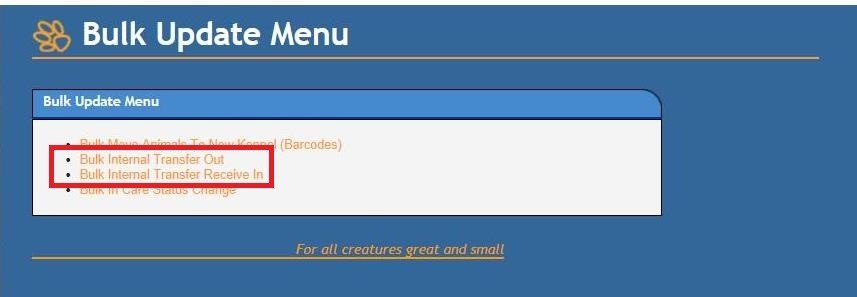
- Locate the Bulk Internal Transfer Out link in the resulting options.
- Click on this link to display a window allowing for Bulk Animal Updating.
- Here you may enter the animals to be transferred by adding each individual Animal ID number one at a time in the box provided and hitting the “enter” key on your keyboard.
- You can also enter multiple animals with sequential Animal ID numbers by entering the first and last Animal Id into the boxes marked add animals by ID range and hitting the “enter” key on your keyboard.
- You can enter litters of animals by clicking the Add Animals by Litter link and Shelter Buddy will automatically add any animals attached to the one you have selected in the first place by the link for litters.
- NOTE: only animals with a current in care status are eligible for transfer. If the animal has an exit or information status, Shelter Buddy will not add it to the list. To add transfer history to animals that have already exited care, you will need to use the Transfer link in their Animal Menu.
- Once you have entered all the animals to be transferred, scroll down the page a little to the box entitled “Update All Animals with the Following Details” and populate the drop down boxes and date box within that area as required.
- Click the button marked Set for all animals.
- Click the button marked Save.
- The animals entered will disappear from the list. This indicates the transfer was successful.
Transfer Multiple Animals In
To receive animals in bulk from the same starting location into the same receiving location, follow the steps below.
- On the Welcome screen, locate the Bulk Updating Menu link in the search menu at the top of the page
- Locate the Bulk Internal Transfer Receive In link in the resulting options.
- Click on this link to display a window allowing for Bulk Animal Updating.
- The only animals that will display here are animals that have been transferred to the same login as the user. NO OTHER ANIMALS WILL DISPLAY HERE.
- Any animals currently registered as “in transit” by Shelter Buddy (those that have been transferred out of one location but not yet received by their destination location) will automatically display in a table. You also have the option of selecting individual animals from this table by clicking the Select link at the end of their record line OR you can select all the animals displayed by clicking the link at the top right of this table marked Select All.
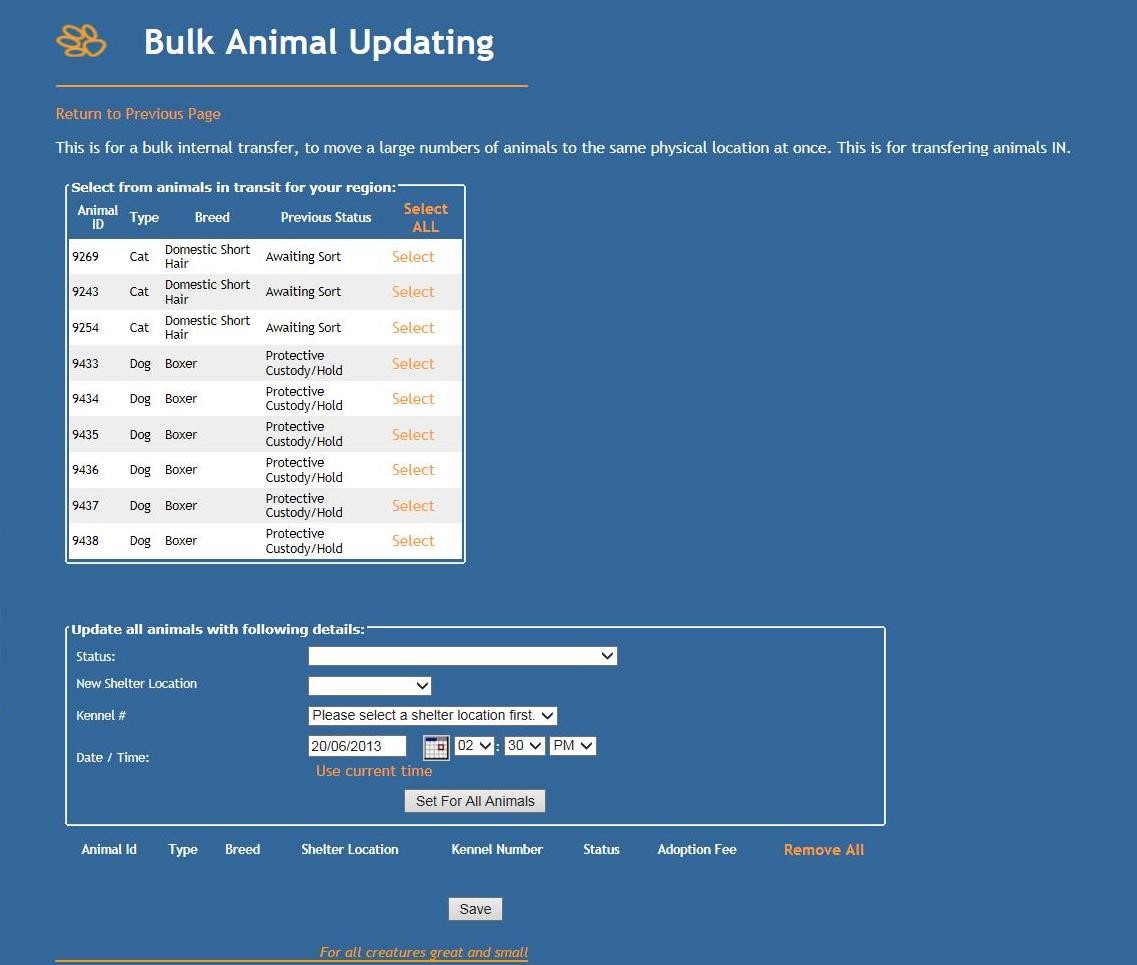
- Once you have selected all the animals to be received in, scroll down the page a little to the box entitled Update All Animals with the Following Details and populate the drop-down boxes and date/time box within that area as required.
- Click the button marked Set for all animals.
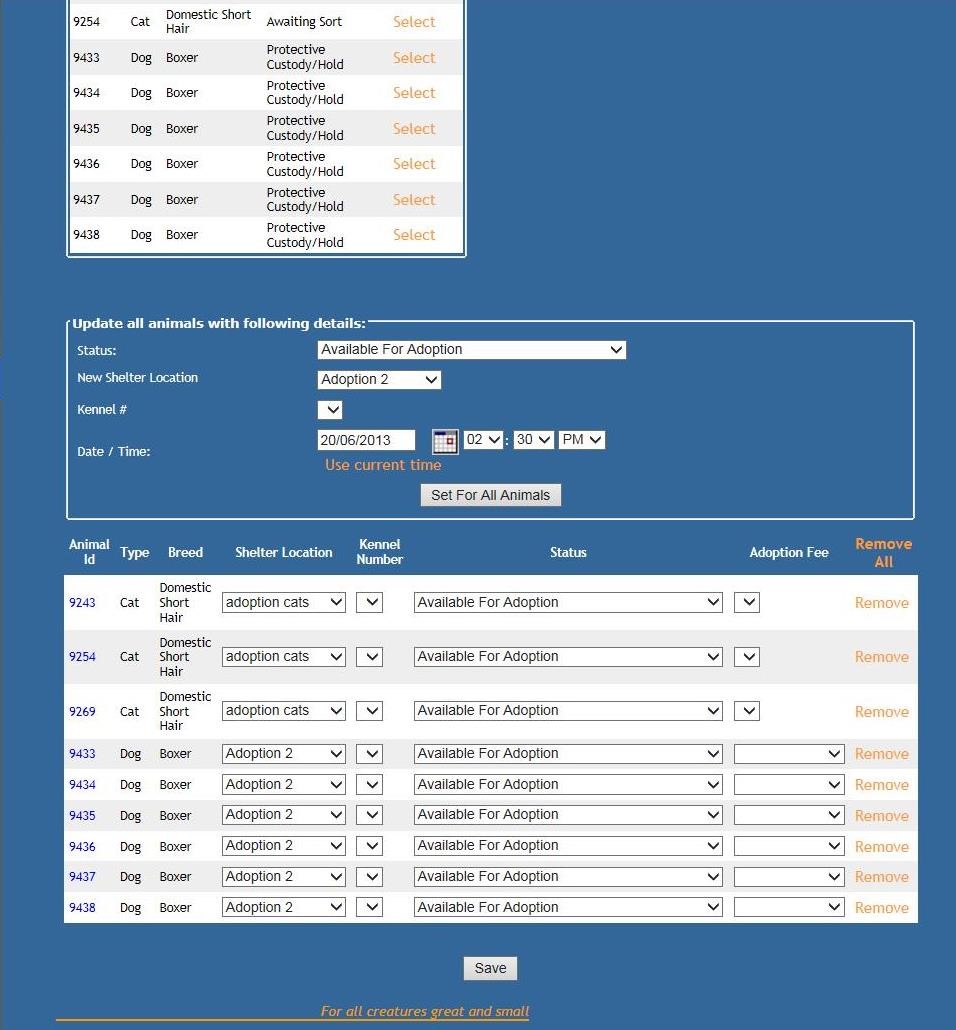
- Set any unique markers, such as kennel numbers and adoption fees as required.
- Click the button marked Save.
- If successful, the page will clear of all animals unless any were left unselected to receive in for this transfer.
Comments