
For sites set to accept Spay/Neuter Deposits which are then refunded to the client once the pet is verified as spayed/neutered. To turn this feature on, please contact support@shelterbuddy.com
This deposit field will only appear for pets where the spay/neuter field = NO
- Make sure Spay/Neuter deposits are accounted for in your Adoption Fee Group. For information on how to set these up, see our help doc Manage Adoption Fees
- To process an adoption, follow the same procedure as per normal, but ensure you select the either Adopted - Awaiting Spay/Neuter or Adopted Unaltered for the status.
- See this help doc for how to process: Adopted - Awaiting Spay/Neuter Procedure - includes Spay Neuter Deposit
- Adopted - Awaiting Spay/Neuter is considered to be "in care" even if the animal is physically with the adopter in the same way a Foster animal is considered in care even though it isn't physically on site. It remains in care until the status is updated to Adopted or Adopted Altered as per your organisations' preferences. The Desex Due Date or Spay/Neuter Due Date would refer to the date the animal is to be returned for surgery.
- Adopted Unaltered indicates the pet was not spayed or neutered prior to adoption and it is up to the new owner to perform that task. The animal is considered adopted and the property of the new owner immediately, with the caveat that the spay/neuter surgery must be performed by the date recorded as the Desexed Due Date* or Spay/Neuter Due Date*.
- Make sure you select an Adoption Fee group that has the Spay/Neuter Deposit accounted for.
- From the Adoption Processing page, a deposit box should be visible at the bottom of the page once the status is set:
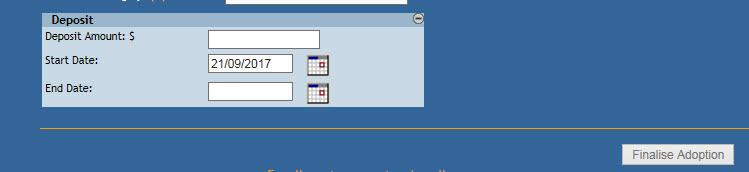
- Deposit Amount: Enter the deposit amount here -
- NOTE this does not automatically transfer to the receipt, so you will need to add it manually if not accounted for in the Adoption Fee group selected.
- Start Date: will default to today. If required, click on the calendar icon to amend the date.
- End Date: click on the calendar icon to enter the date the animal is due to return either for Spay/Neuter surgery or with proof of Spay/Neuter, depending on your internal process.
- Deposit Amount: Enter the deposit amount here -
To process the refund of a deposit once proof of Spay/Neuter has been confirmed:
(Note: this can be set up ahead of time, it need not be processed on the day in question)
- First, you will need to Setup Default Account for Spay Neuter Refunds. Click the link to see our help doc on how to set this up. Note: you require access to the Administration menu to set this up.
- From the Person Details page, find the link in the Person Menu at the top of the page called Spay/Neuter Deposit Refund.
- Click on this link
- In the pop-up, complete the following fields:
- Refund Date: Click the calendar icon and enter the date the refund was processed or dated.
- Amount: Enter the amount of the refund as a whole number
- Refund Type: Enter the manner in which the refund was given (e.g. Cash, Direct Debit, Cheque, etc) into this free text field.
- Animal ID: Confirm the Animal the refund is linked to.
- Click Save. The modal will close
- To issue a Receipt (if required):
- Click on the (H) History link after the Spay/Neuter Deposit Refund header.
- Locate the refund you would like to create a receipt for from the list:
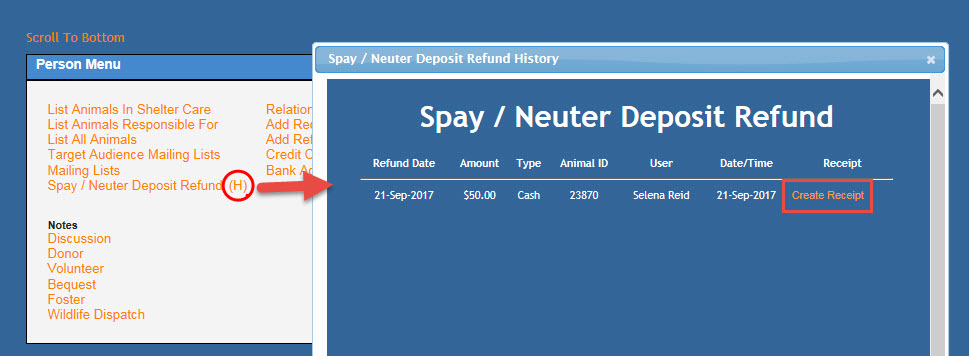
- Click the link to Create Receipt
- A new receipt will open in the pop-up modal.
- On the receipt page, select the Refund Method (e.g. Cash, Credit, Debit)
- The Refund Amount will default to the amount set up in the Spay/Neuter Deposit Refund link earlier.
- The GL Code will default as set up in step #1
- If required, have the client sign that they have received their refund.
- Click Update and Print. Print a copy for your customer's use if required.
- Close the modal to finish.
* NOTE: The Desex or Spay/Neuter Due Date field can be entered directly into the field (no need to use the old scheduling module) and tracked via report 181 "Scheduled Surgery Report" and 241 "Foster Animals Due for Treatment".
Comments