

This document helps you understand how to read and navigate your roster.
- Log into VolunteerBuddy. For tips on how to do that, see our help doc here Getting Started
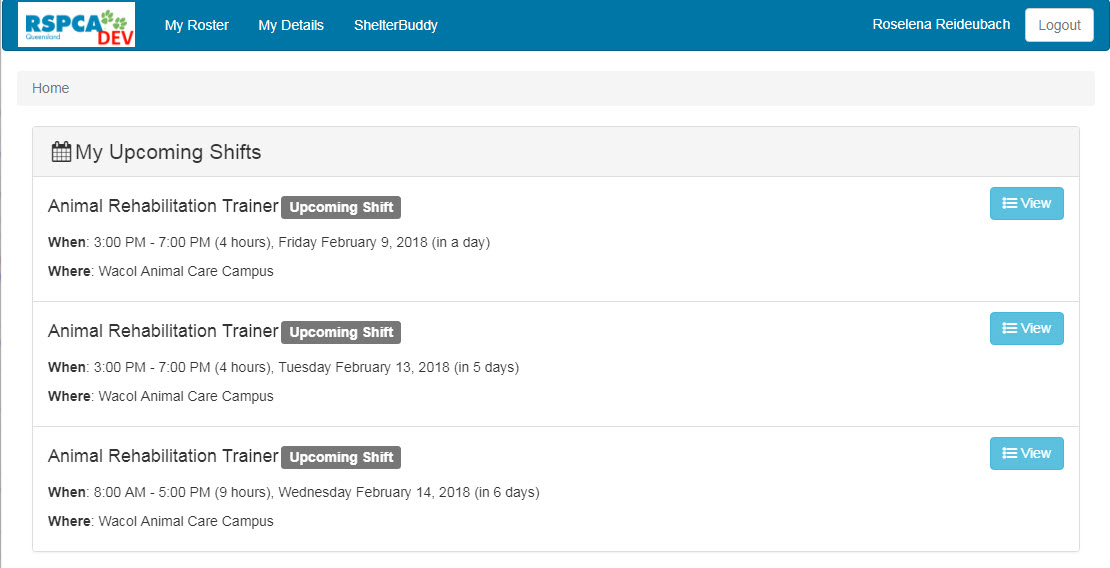
- The Home page will display the details for any upcoming shifts, with an option to View on the right of each:
- If you can't attend that shift or would like to cease volunteering for that shift entirely, click the View button. Details for the shift will display to confirm the shift you are working with. On the right are options to Remove from My Roster or Cannot attend.
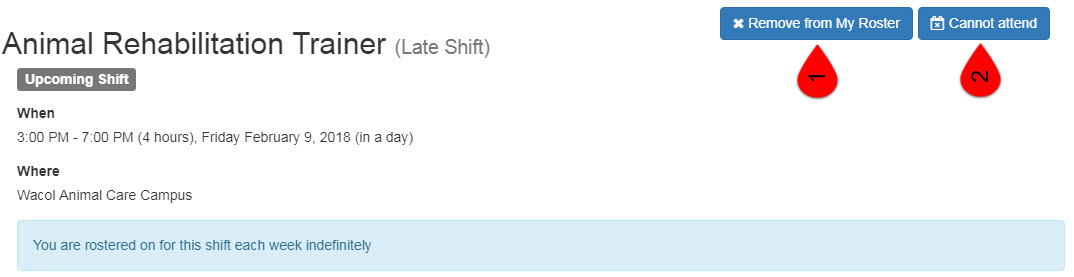
- Remove from My Roster means you don't want to work that shift anymore. It will remove all upcoming shifts.
- Cannot attend means that for whatever reason, you are unable to attend that particular rostered shift. If you apply this button, you will be asked to select a reason you can't be there and offered a text box to add any additional explanation if desired.
- If the shift is about to commence or has already, you will see a notification that the shift is in progress and you should log on.
The view from the Roster looks like this:
The view from the Home page looks like this:
- To clock on for your shift, click the View button from the home page, or the name of the Event from the roster page to load the details of the shift. You will see two buttons on the right:
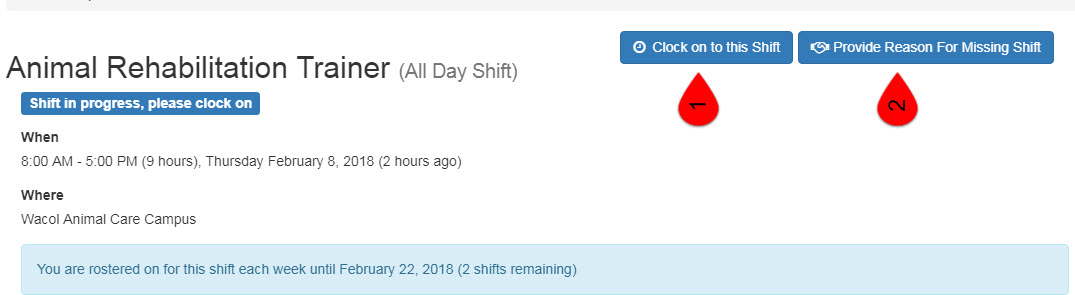
- Clock on to this Shift starts the timer and identifies that you are present and working the shift. You may clock on up to an hour on either side of a shift commencing, provided the end time has not yet elapsed.
- Provide Reason for missing Shift confirms that you cannot attend unexpectedly and gives you an opportunity to explain why.
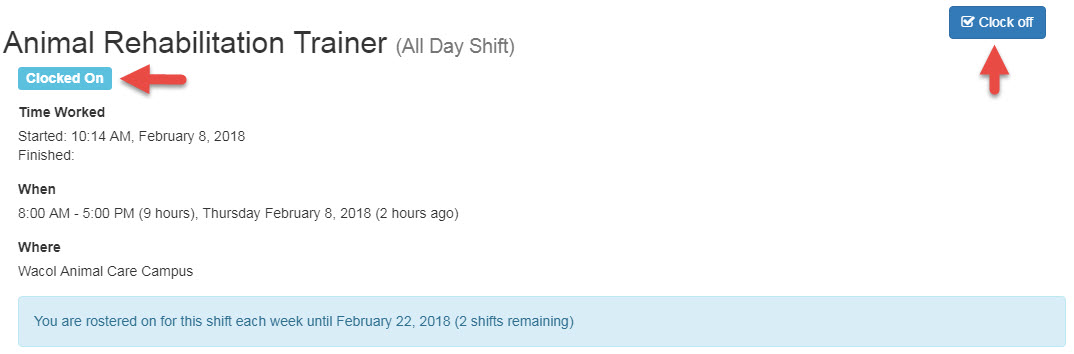
- Once you have clocked on, you'll notice this button changes to Clock off. Simply click this button when you've finished the shift.
To assign yourself a new shift:
- From the Home page, click the link in the upper menu My Roster
- At the bottom of the page, look for the header Add A Shift
- Beneath this, you will see a list of Roles or Events you are qualified for, organised alphabetically by the location they are available at.
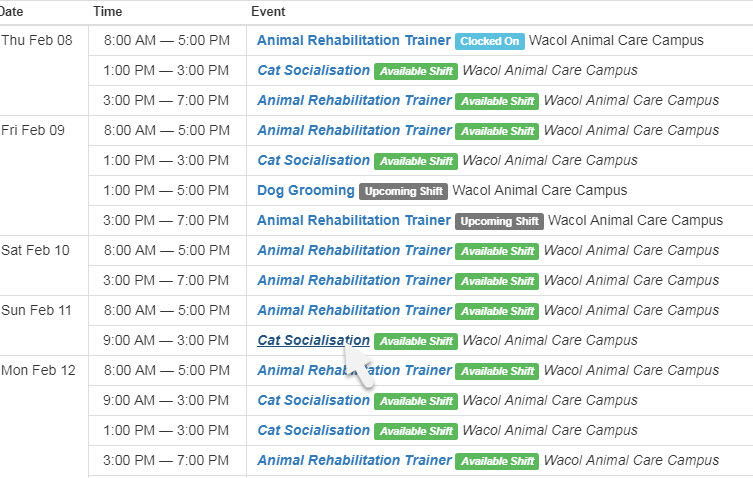
- Click on one of these roles and the week roster above will change to show available shifts for that role, indicated in Green:

- Note that any shift you are currently clocked on for appears marked by Blue and any shifts you are already rostered for - regardless of whether or not it's selected - will also show indicated by Grey.
- You can click to select as many roles as you like to see what you'd like to roster yourself for.
- To add a shift to your roster, click the Event link for the shift and role you'd like to work:
- When the details for the role load, click the button Add to My Roster in the top right corner.
- Click the down arrow on the How often? drop-down to select how often you would like to volunteer for this shift. Select from these options:
- This week only
- Each week (this will default)
- Each fortnight
- Every three weeks
- Every four weeks
- Unless you selected This week only, place your cursor in the text box titled Until? and select an end-date for your availability for that shift OR leave this blank to roster yourself on that shift indefinitely.
- click the Add to My Roster button to complete.
- The page will confirm your roster by showing the Upcoming Shift notification beneath the Event/Role name and a blue banner with the details you selected
- Click Remove from My Roster if you've changed your mind
- Click Cannot attend if you know in advance you won't be able to attend the next shift and enter a reason for the absence.
My Roster:
You have the option to view your option in four different ways:
- Agenda: This is the default view and shows a list for the upcoming week, broken down into days, shifts and events.
- Day: This option shows your rostered shifts one day at a time. If they are rostered consecutively, they will appear one below the last. If they overlap, they will be shown overlapping on the roster, with the last one slightly offset so you can clearly read the details of the last.
- Week: this offers an alternate view of the week, where each shift is represented as a graph. Click on the elements of the graph to see details of any given shift.
- Month: this view shows you the whole month's rostering, highlighting "today" so you can see easily where you are in that month and what is upcoming. You can access any shift by clicking on it.
You also have the options to move back and forth by clicking the Today, Previous and Next options at the top right.

These options move you to the next or previous day, week or month, or return you to "today" regardless of how far you've moved within your view.
Comments