
This process allows you to set up medications for an animal that is administered multiple times a day.
This process can be done via the Edit Animal Details page or the Medical Notes page, anywhere the Add Medication link appears. The walkthrough below assumes you already know how to find this link on the animal's record.
- From the Welcome/Search page, search and access the Animal Details page for the pet requiring medication.
- Locate and click on the Add Medication link using one of the following links:
- Add Medication link in the Animal Menu on the Animal Details page
- Add Medication link in the Vet Treatments menu on the Medical Notes page
- Add Medication link in the Add Consultation / View Consultation History process(es) via Medical Notes page
- Add Medication link in the Add Costed Clinic Consultation / View Costed Clinic Consultation process via the Medical Notes page.
- Animal Tasks link on either the Welcome/Search page or in the Animal Menu on the Animal Details page. Click the down arrow on the Actions button on the Animal Tasks row to select the option Add Medication to Animal.
Add Medication:
- Animal ID: This will auto-populate with the Animal ID for the file you are working with. This is required so the page knows which animals these medications are assigned to later.
- Physical Location: This will default to the location the ANIMAL is in, not the user. This is because medications on the Animal Task page are filtered by locations, so if it was linked to the user's location instead then you might miss medications assigned to an animal in a different region. (E.g. if an authority at one location must prescribe a medication for a pet in a different region). You can change it by selecting from the drop-down if required. It has a help button to guide you if you need further tips.
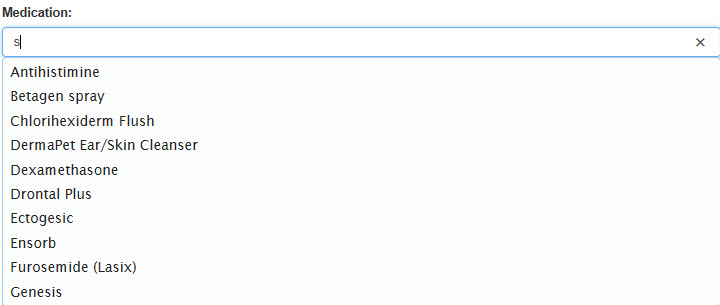
- Medication: This is an auto-suggest list and a mandatory field. Type something into the text box and you will be offered a list of options to choose from. For example (not real data):
- Amount to be administered each time: This is a mandatory field. Enter the amount of medication that should be administered for each dose. You can add it either as a simple number ("1") or you can add a descriptor ("1 capsule"). The number can be a whole number or a decimal fraction, as required: it's a free text field so you can enter it as you prefer.
- For Stage 1, enter only the highest dose the pet is to have.
- Total amount dispensed (for tracking costs): This is a mandatory field. Enter the amount of the medication dispensed in total (e.g. 50 for 50 mls or 50 tablets). This field only accepts digits.
- Date Dispensed: This will default to TODAY. Click into the box to amend the date if required. You may either select from the calendar or type it directly into the box (make sure you use the same date format as the rest of the page).
- Is this medication being administered now? Click the down arrow to select the option This is a scheduled medication.
- Is this a recurring task?: Select the option YES. Additional options will now appear.
- Schedule: Click this Help button for a tour of each feature below, should you need any additional pointers. This can be returned to as often as required.
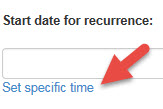
- Start Date for Recurrence: Enter the first date the pet is to begin the medication at this dose. This may or may not be the same as the Date Dispensed.
- Beneath the date box is a link to Set specific time. Click this link if the starting dose needs to be given at a specific time:
If the first dose is being administered in the afternoon, but the schedule usually starts from the morning, set this time to the AFTERNOON DOSE.- Click into the box to select a time:
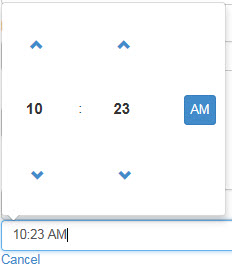
- Click the up or down arrows to move in increments of one (1)
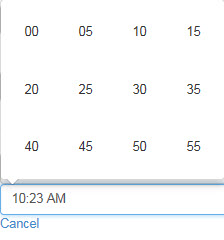
- Click on the number itself to choose from a range of numbers: hours will give you a range of 1 - 12, minutes will give a range in 5-minute increments between 00 to 55:
- Click the AM/PM button to toggle between the two.
- Click into the box to select a time:
- Repeat Every: Select an option for how often doses are to be given until it needs to reduce to the next dose level. E.g. if an animal is to be dosed every day or once a week, enter 1 into this box. If the pet is to be dosed every second day, enter 2 into this box. If the pet is to be dosed every 3 months, enter 3 into the box.
- Click the down arrow beneath this to select an option for day, week, month or year:
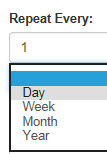
This tells the schedule how often to prompt to dose this animal. It will default to "Day"
- Click the down arrow beneath this to select an option for day, week, month or year:
- Number of times per occurrence*: Enter the number of times the animal is to be dosed: e.g. if the animal needs to be medicated twice a day, enter 2
- Set Specific Times: Click this link if the doses need to be administered at specific times each day. It will open the same number of options as entered into the text box above it, e.g.:

Set the time in these boxes as done before, but this time, the first time entered should be the anticipated MORNING DOSE: click the box to either enter directly into the box or select from the options offered. - Repeat as required until the time is set for each box.
- Click the Cancel link to close and set a new Number of times per occurrence if required.
- *NB: this option will not be visible if you are using Free Text Medication Labels. It is assumed the number of occurrences will be manually noted on the label.
- Set Specific Times: Click this link if the doses need to be administered at specific times each day. It will open the same number of options as entered into the text box above it, e.g.:
- How long should this task run for?: This drop-down controls how long the medication should be administered to the animal until it needs to reduce to the next dose level, if applicable. It contains four options:
- Indefinitely: Select this option if the pet is to be on this medication for the rest of its life at this dose rate. If this option is selected, skip now to Point #10
- Until a specific date: Use this option if the pet is to be administered administration only until a specified date, regardless of how many doses it's actually had. This option might be used if the pet requires a veterinary recheck at a specific point to check the efficacy of the medication.
- Enter the date the task should end: A date box will appear below the drop-down if this option is selected. Click into the box to select a date the medication is to be finished.
- Until the task has been completed a certain number of times: Use this option if the medication needs to be administered a set number of times. This will add additional instances to the schedule if a due dose is skipped.
- Enter the number of times the task needs to be completed: Click into this box to enter the number of instances that must be completed for this medication schedule to be considered complete.
- After a certain amount of scheduled occurrences: Use this option if the pet requires a specific number of scheduled doses, but if one is skipped it doesn't matter, the medication will still end after the same number of scheduled occurrences as it began with.
- Enter the number of scheduled occurrences: Click into this box to enter the number of scheduled occurrences that must be met for the medication to be considered complete.
- Prescribing Vet: Click the down arrow to select the name of the vet prescribing the medication. This list is populated via the list of Vets managed in Administration > Edit Drop Down Lists > Vets. For more information on how to manage the contents of this list, see our help guide here: Manage Vets
- Reasons for Medication: Click the down arrow to select the reason the medication has been prescribed for this animal. This list is managed via Administration > Edit Drop Down Lists > Edit Medication Reason. This is a quick entry screen, so simply type into the text box and click the Enter key to add new items.
- Notes: This is simply a free-text field so you may enter any additional information required relating to this medication.
- Click the Save button to complete and return to the screen you began with
OR - Click the Cancel button to escape without saving. You will be asked to confirm you wish to cancel before the modal closes and you return to the screen you began with. Click the Cancel button to confirm, or Stay on Page to return to the Add Medication modal.
Comments