
This process allows you to add spay/neuter information to multiple animals at once, to help shortcut your workload.
- From the Welcome/Search page, click the link Bulk Updating Menu in the Search Menu.
- In the menu list, find and click on the option Bulk Update Spay/Neuter Details (may be variously labelled depending on local settings)
- The Bulk Update - Select Animals page will load. Add animals to be updated either by Animal ID number, by Dispatch Job number, by Animal ID Range (e.g. 100 - 110) or by Litter (add one Animal ID and all animals linked as a litter will be added to the list).
- Click the (+) button or press your Enter key to add the animals.
- To remove animals, click the box beside their row and select "REmove" from the Choose an action drop-down box, then click the Apply to selected button.
- Once all animals are added and correct, click Next
- You will arrive at the Bulk Update Spay/Neuter Details Page.
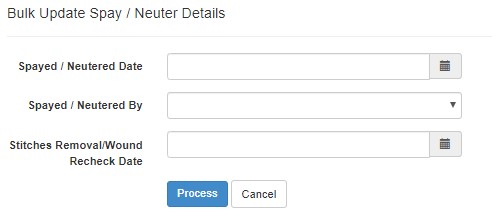
- Spay/Neuter Date: Enter the date these animals were spayed/neutered by clicking the calendar icon and selecting, or by typing the date in the same format the field uses (either dd/mm/yyyy or mm/dd/yyyy depending on local settings)
- Spayed/Neutered By: Select the surgeon who performed the surgery from the drop-down list of veterinarians.
- Stitches Removal/Wound Recheck date: Select a date the stitches/sutures are to be removed or the wound rechecked if required.
- Click the Process button.
- You will return to the Bulk Update - Select Animals page.
PLEASE NOTE: This process does not change the animal's Primary Status. It simply updates the Medical Details page and the Spay/Neuter status.
Comments