
This process allows you to add a brand new user to your site.
You require access to the Administration menu to utilise these options.
We recommend you use Find User to make certain that the user does not already exist before adding a new one. Each username may only be assigned once per system and it will block you from adding additional logins if you attempt to create a user with a duplicate username.
To find an existing user:
- Click on the Administration link in the Orange Menu on the left-hand side of the screen.
- Click on the Edit User Access link.
- Click on the link Find User to make certain that the user does not already exist before adding a new one (recommended)
- You can search for either First Name, Last Name, or both. This feature will search for even partial entries for either/both.
- You can search using a Login Name if you have a standard format for them. NOTE: it will only find an existing login name if it is entered exactly the same for searching. It will not find partials.
- You can search by Region, or for Active / Inactive logins (or both), or for just Volunteerlogins.
- You can search using any combination of the above.
- If the user is not found, return to the Edit User Access menu and click the link Add User to arrive at the Create User page
To add a new user:
- From the Welcome / Search page, click the Administration link in the orange left-hand menu.
- From the Administration Menu, click the option Edit User Access
- Click the Add User link to arrive at the Create User page
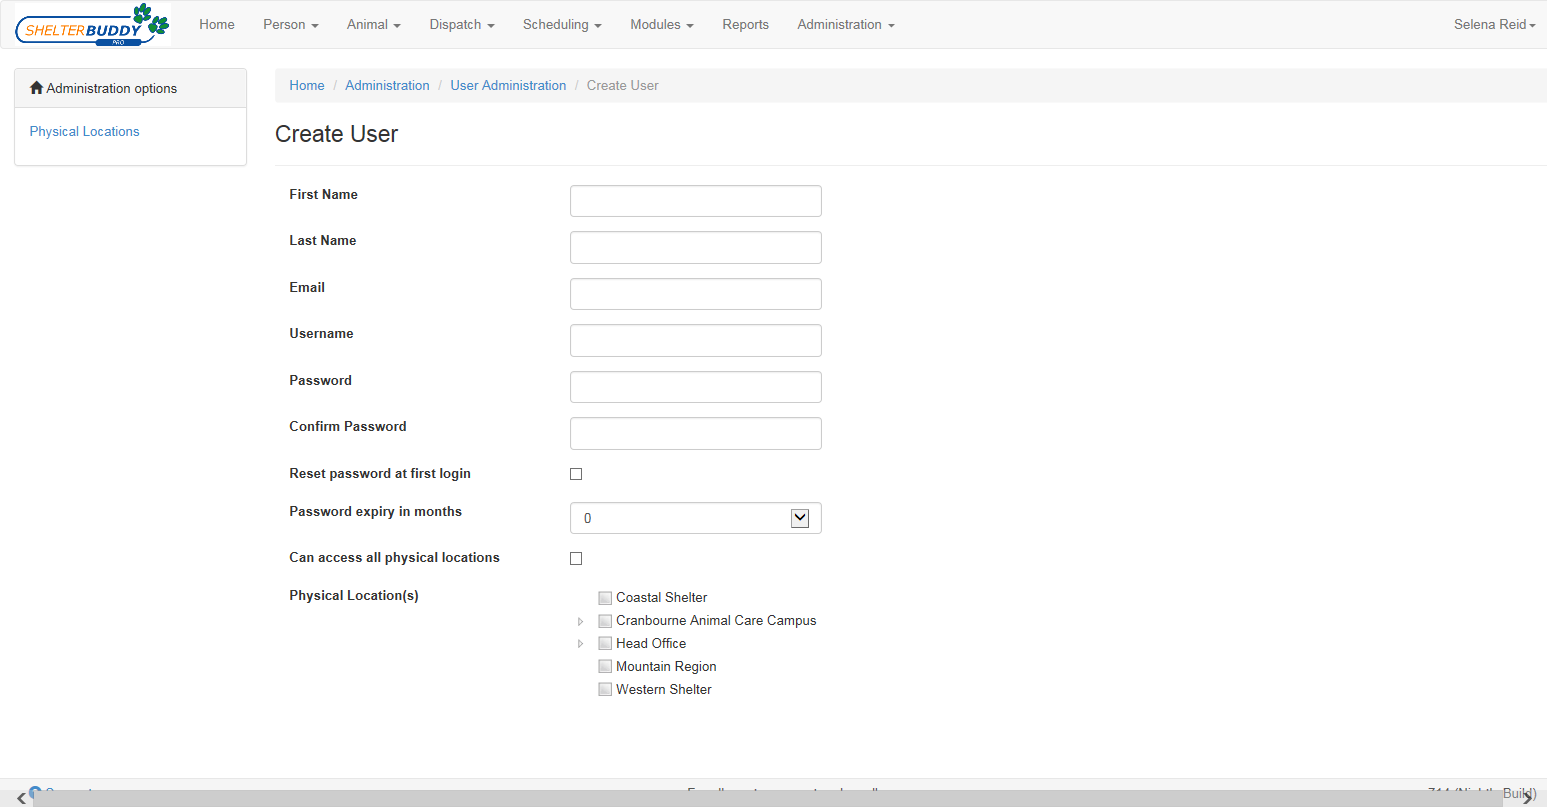
- Enter the name the user would like displayed, as they would like it displayed, as appropriate into the First Name and Last Name text boxes: e.g. Dr. John Smith, John Smith, john smith esq.
- Email: enter the user's email address so they can reset their login if required. This is not a mandatory field but is very helpful for user maintenance.
- Enter a username – this is the name the user will use to log in: e.g. jsmith NB: user names are case sensitive and cannot be issued more than once.
- Enter a password: This must be at least 3 letters and 3 numerals, but not exceeding 15 characters in total. These are also case sensitive. Re-enter exactly the same text in the Confirm Password field: if the two fields do not match, the profile will be rejected.
- Reset password at first login: Click this box if you would like your user to be prompted to select a new password the first time they log in.
- If applied, the first time the user logs into your site, they will be taken directly from the login page to this screen (once their original user name and password are successfully entered):

- Once they successfully select a new password and click the Save Password button, they will return to the login screen which will show a notification that their password was successfully updated:

- From here, they re-login using their new password and proceed as normal.
- Password Expiry in months: Optional. You can set the password to expire at intervals, forcing the user to select a new one periodically as a security measure. click the down arrow on the text box to select any thing from 1 - 24 months:

- Note: users can manually select a new password at any time by clicking the User Settings link in the top right of any Shelter Buddy screen (once logged in).

- Clicking either the words User Settings or the icon beside it will take the user to the Change Password page.
- Physical Location(s): Mandatory field. Click to assign which physical locations the user can log in as.
- Default Physical Location: Select which Physical Location you would like to set as the default for this user. The default Physical Location must be selected in the Physical Location(s) list as well (even if the user is only assigned to just one region). This is a mandatory field.

- Group: Optional, but recommended. Assign a user group to the user to set their access level.
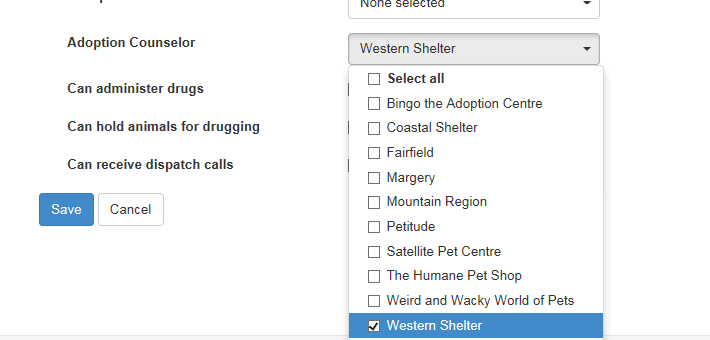
- Adoption Counsellor: If checked, this feature will make the user’s details appear in the Adoption Counsellor list on the adoption page. You will also need to mark the Shelter Location/Region the person is an Adoption Counsellor for. This will make the person only appear in the Adoption Counsellor list for those logged in at that region.
- User can administer Drugs/hold animals for drugging: recommended for vet staff or other staff who administer or work with restricted drugs.
- User can receive dispatch calls: if checked, this feature makes the user’s details appear in the dispatch page list of people who received a dispatch job.
- Note: this is different to the list of people who can be assigned to a dispatch job. That list is maintained only in Dispatch Admin.
Once completed to your satisfaction, click Add User to complete. The finished page should look something like this: 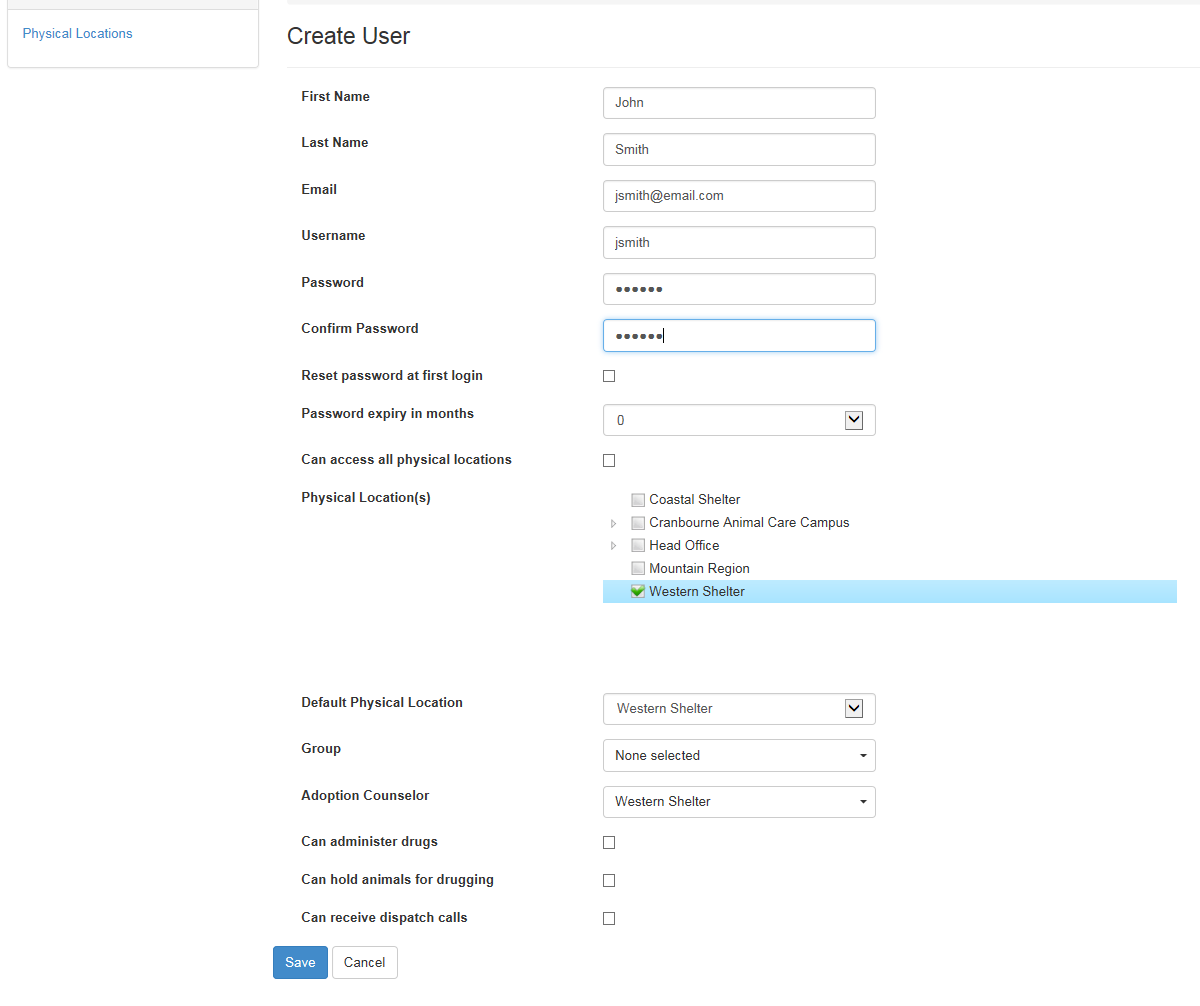
Comments