
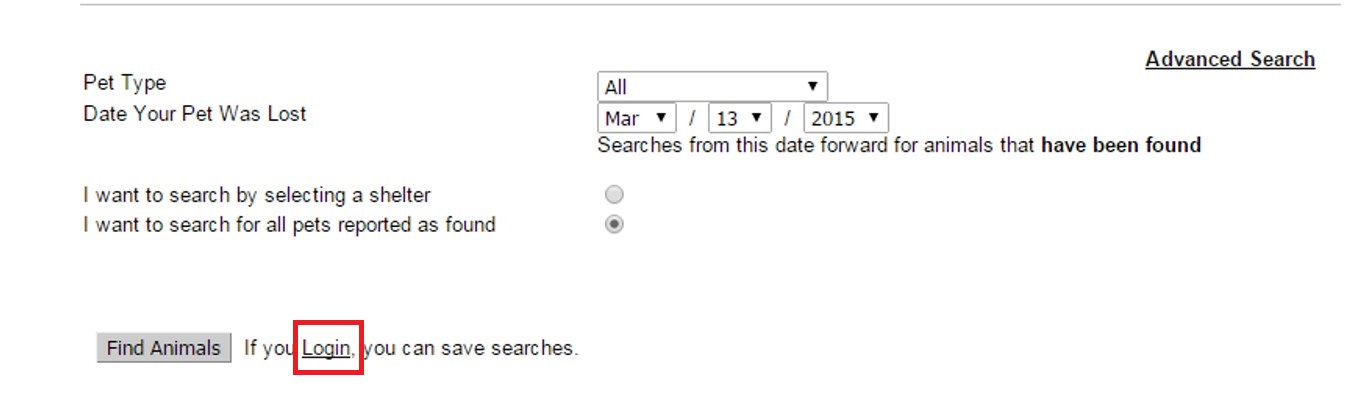
This process describes how members of the public can enter lost or found reports directly to the public site.
All information entered by the public must be verified by Shelter Buddy users before it will display publicly, to protect the site from inappropriate content and so public entered data can be linked to Shelter Buddy data.
Step 1: Create a Login
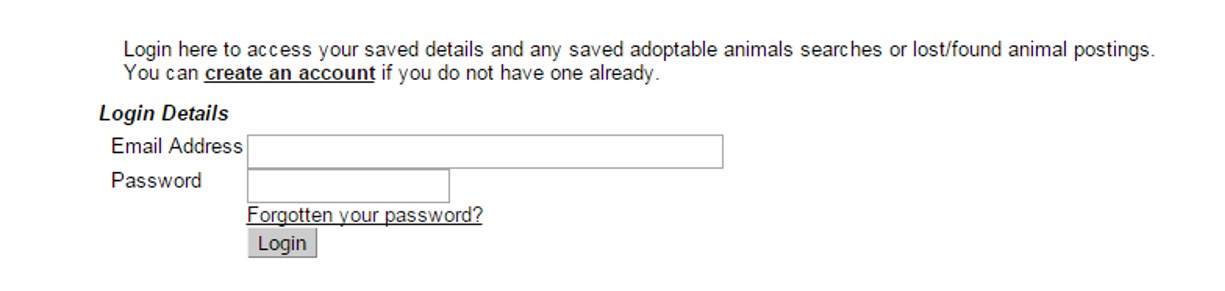
The site needs to confirm your details before it can email you information. If you don’t already have a login, click the Login link and fill in the required fields to create a profile. Fields marked with an asterisk are mandatory. This information helps protect your information.
Step 2: Verify your login
Once you have created a valid login; the site will email you to confirm the information you entered is correct. Click the Verify Email link to verify your details and open a new search page in your default browser. Here, you can login for the first time.
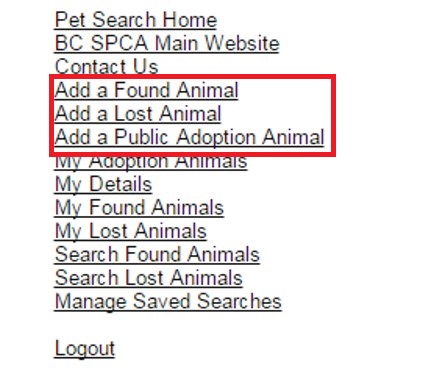
Step 3: My Profile
Once you have logged in, a page like the one below will display. The options found here will vary depending on the site's custom settings, but the three links indicated below can be used to add an animal to the site, depending on if it is a Lost animal (its whereabouts are unknown), a Found animal (the owner's whereabouts are unknown) or if it is a private adoption animal offered on the site.
Step 4: Add the Animal
Having selected a link; a page like the one below will display:
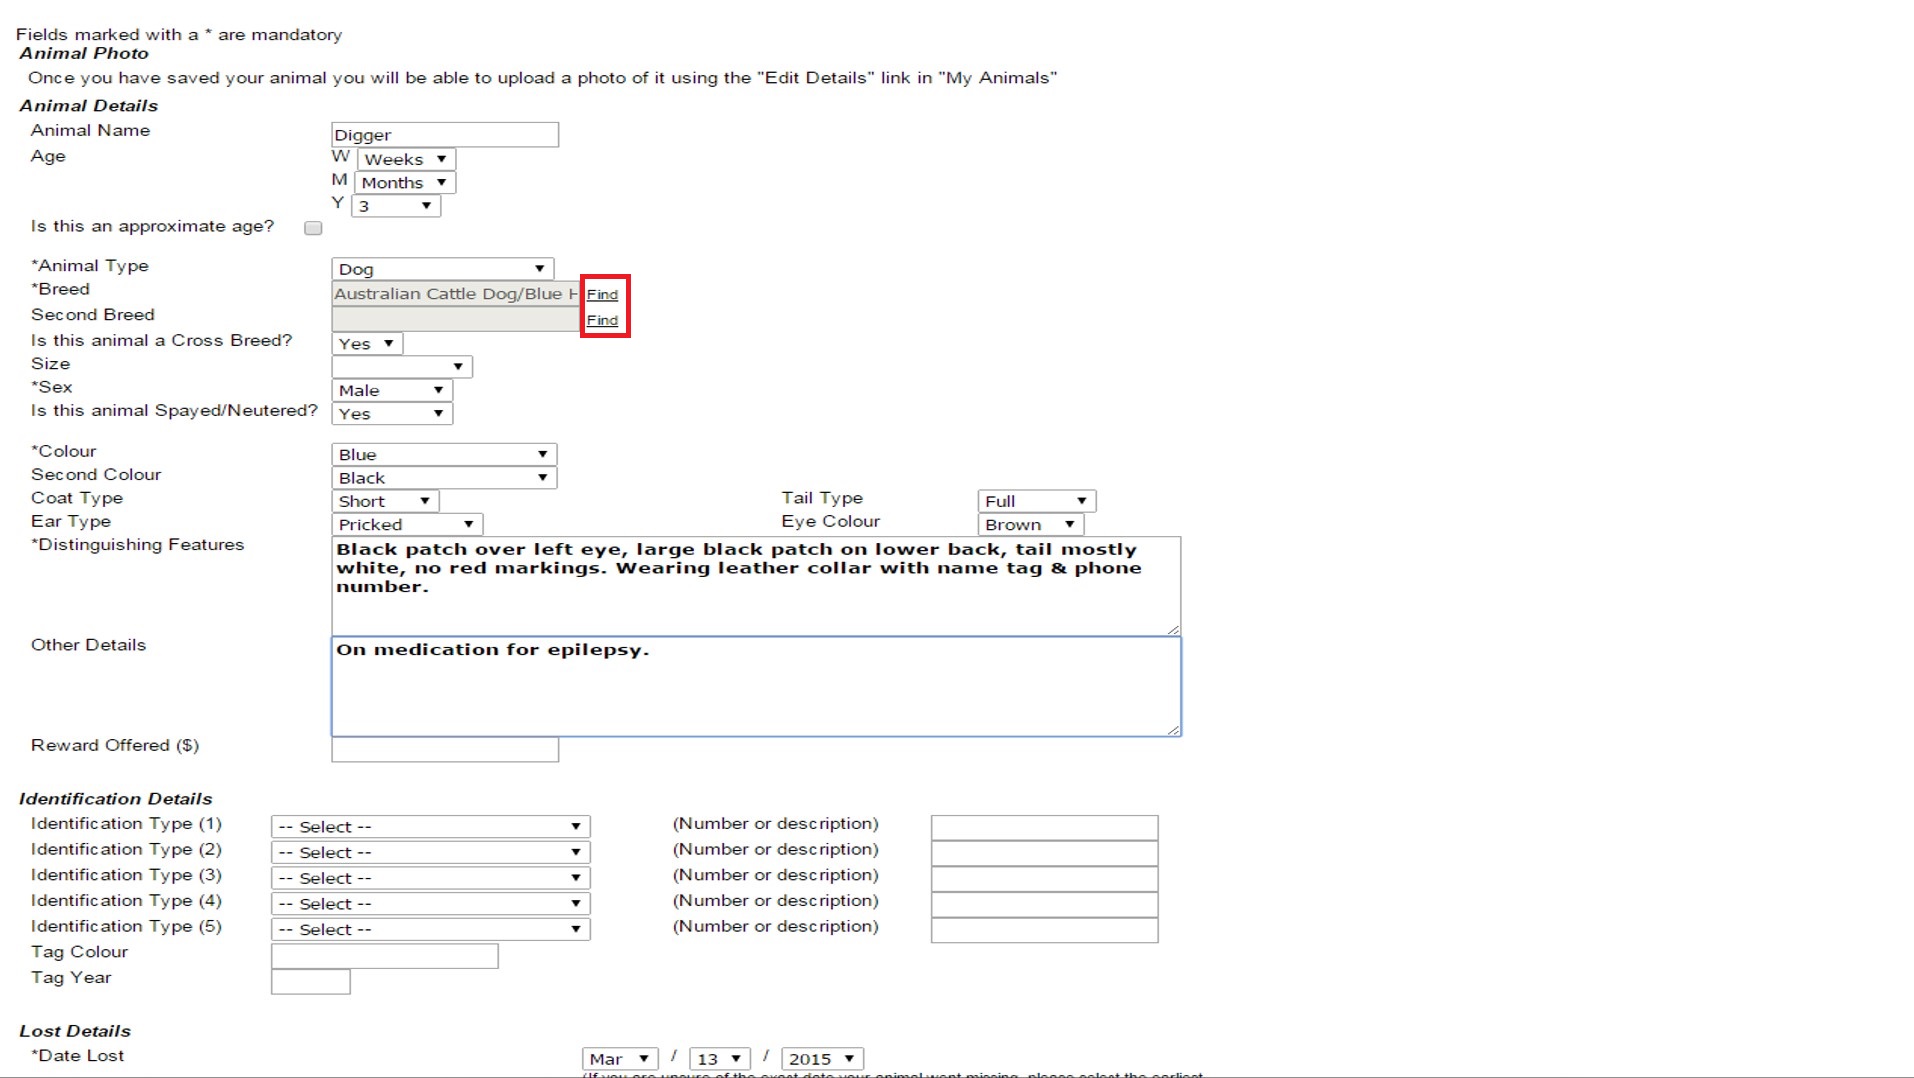
Fields that are set as mandatory for your site are marked with an asterix.
Please note that unlike Shelter Buddy, Breed and City/Suburb fields are not auto-complete/auto-find, but instead, wherever the "Find" link is seen (marked on the screenshot above) the user must click the link to see a list displayed and then select from this list. If they fail to do this, the site will not recognise their choice and will tell them a Breed or City/Suburb must be entered (even if unrecognised text is present).
Once all the information has been entered, the user clicks an "update" button at the bottom of the screen to finish.
Step 5: Add a Photo
Once the details have been saved, the screen will reload and an option to add a photo will appear at the top of the screen:
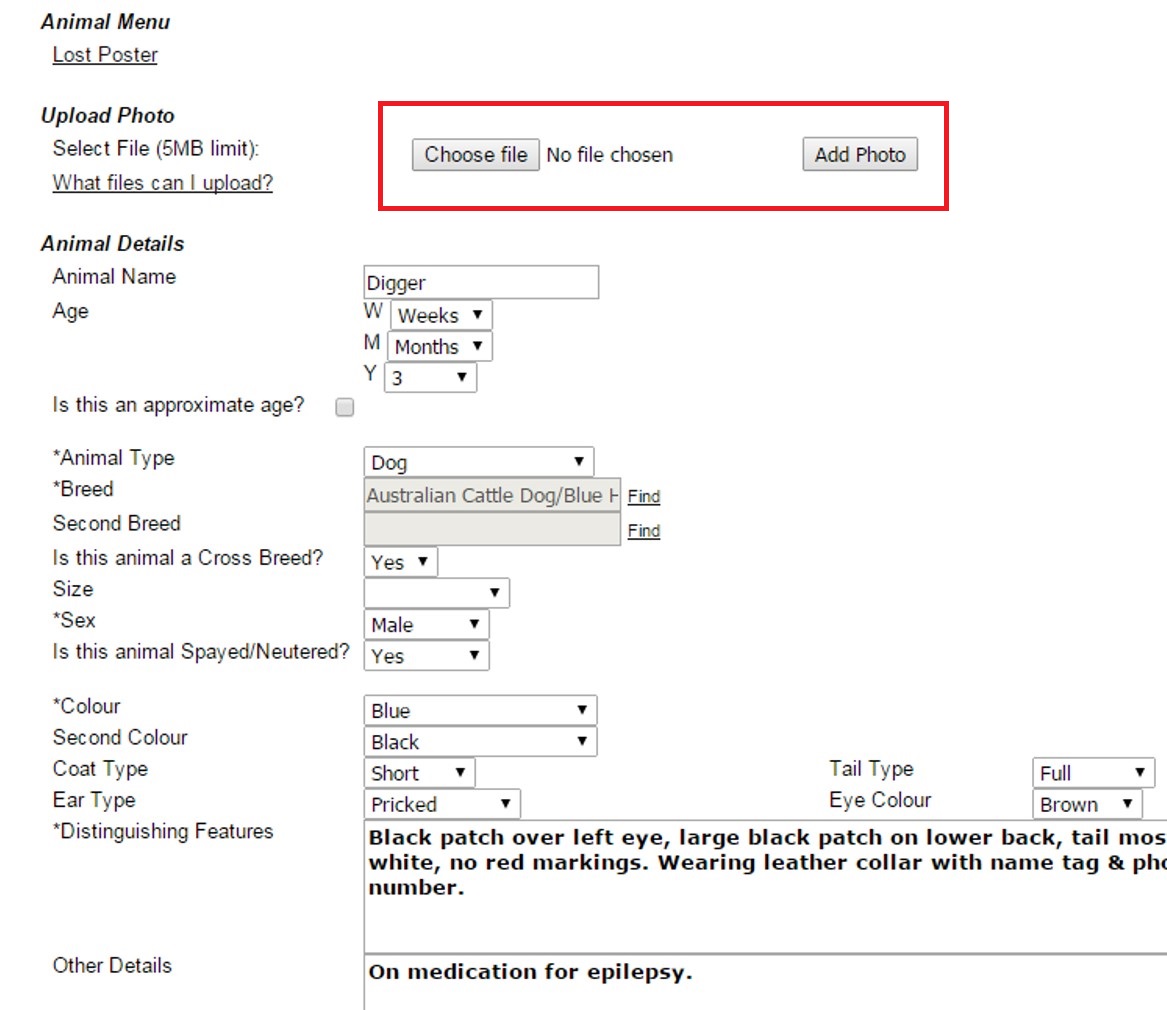
Users can upload a photo of their pet here - there is also a link to guide them in what file types are accepted by the site.
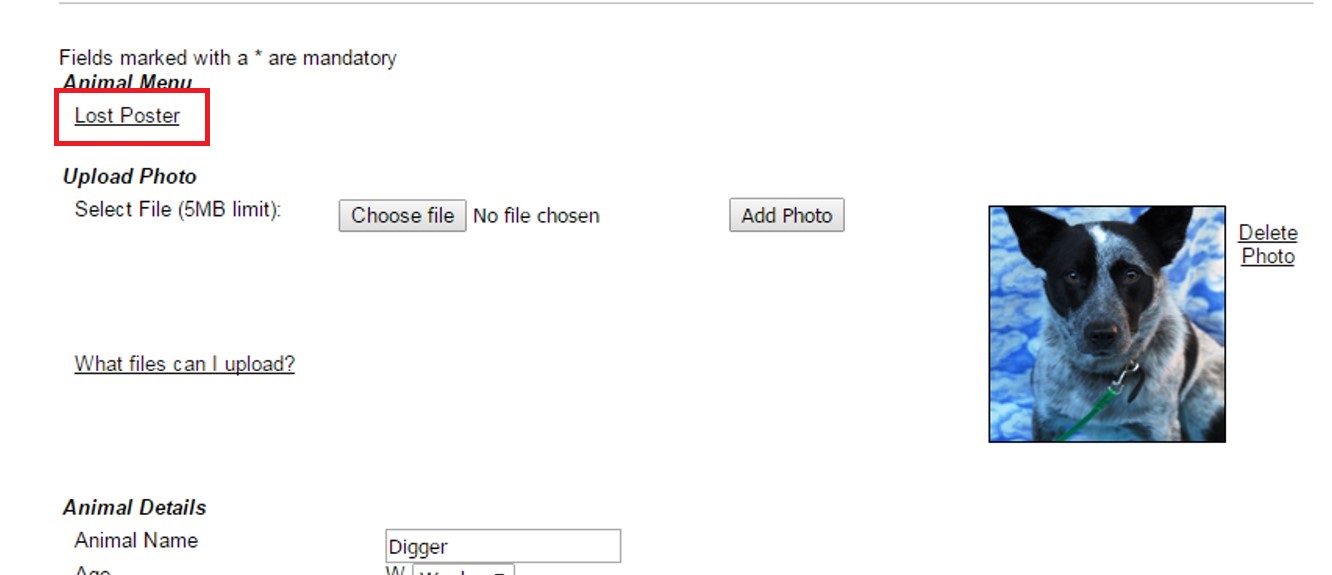
Step 6: Print a Poster
With or without a photo, public site users can now print a poster of their pet with all the relevant details displayed by clicking the link marked here:
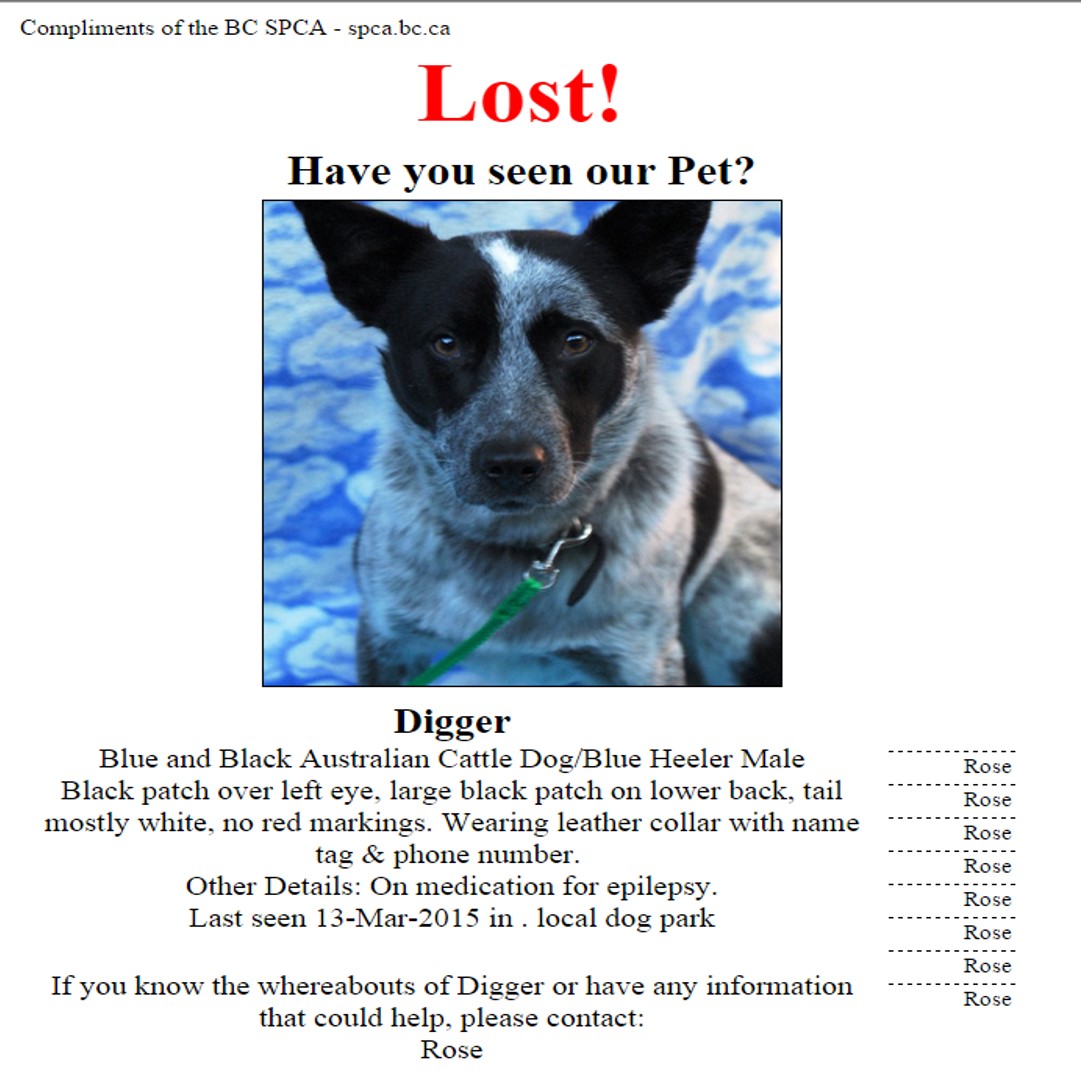
The poster looks something like this:
The public user will receive an email to let them know the animal has been successfully added to the site and is awaiting verification. Once the animal is verified by Shelter Buddy users, they will receive a follow up email to confirm the details will now display publicly.
Removing an animal from the Public Site
There are three methods of removing an animal from the public site.
Firstly, a Shelter Buddy user can simply update the status to a "closing status" such as Returned Home or Matched.
Secondly, once the file has been verified the public site user can de-activate it at any time by clicking the link "My Lost Animals" or "My Found Animals" (as applicable to the animal they entered) and from the resulting list clicking the button indicated here:
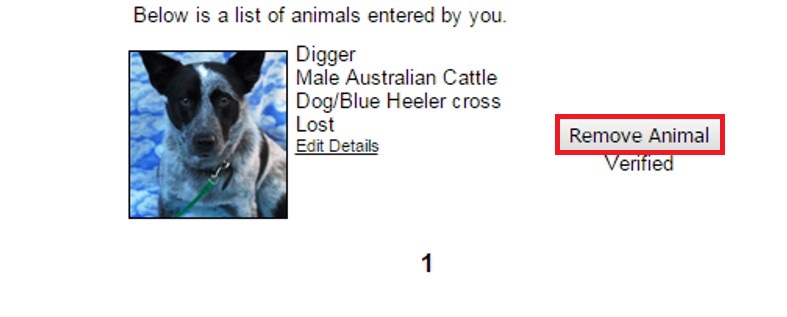
This will remove it from public visibility, but it will still be active on Shelter Buddy.
Finally, the site can be set so that pets are removed after a certain number of days. Once the pet has displayed for the maximum number of days, it is automatically removed from the site, but it can be reinstated at any time by updating the status date on the Shelter Buddy file.
Comments