
This process allows you to set up limited or restricted access to a report or group of reports, or allow access to only selected reports within a group.
Notes:
- Users assigned to an individual report will be able to access it even if the Report Type or Group it belongs to is restricted.
- Users assigned to a Group will be able to access reports assigned to a Report Type, but users only assigned to the Report Type will NOT be able to access reports in a restricted Group.
- Users assigned only to a Report Type may find certain reports within that list restricted if those reports belong to a Group or are individually restricted.
To perform these functions, you will need access to the Administration menu.
To Restrict the Report Menu
If you wish to restrict access to any and all reports to a limited few, you can do this by restricting access to the Reports link in the orange menu on the left of the screen.
- Click on the Administration menu in the orange menu on the left of the screen and then locate and click on the Edit User Access link.
- Click on Manage Pages
- Use the Find Page function to search and make certain the page does not already exist here. NB ensure it has the same URL address as the current page, i.e. ends in aspx. If it does not, this entry is out of date and won’t work. If the page does exist, skip to point # 7
- If the page is not found, return to the Manage Pages main page and click on the New Page link.
- From the drop-down at the top of the page, find and select the option Reports then click Save to add the page. NB as soon as you do this, NO USERS will have access to the reports menu.
- Return to the Manage Pages main page and use the Find Page function to locate the Reports page you just added.
- Click the Edit link to open the details for the page. You will see no users or groups are currently assigned access.
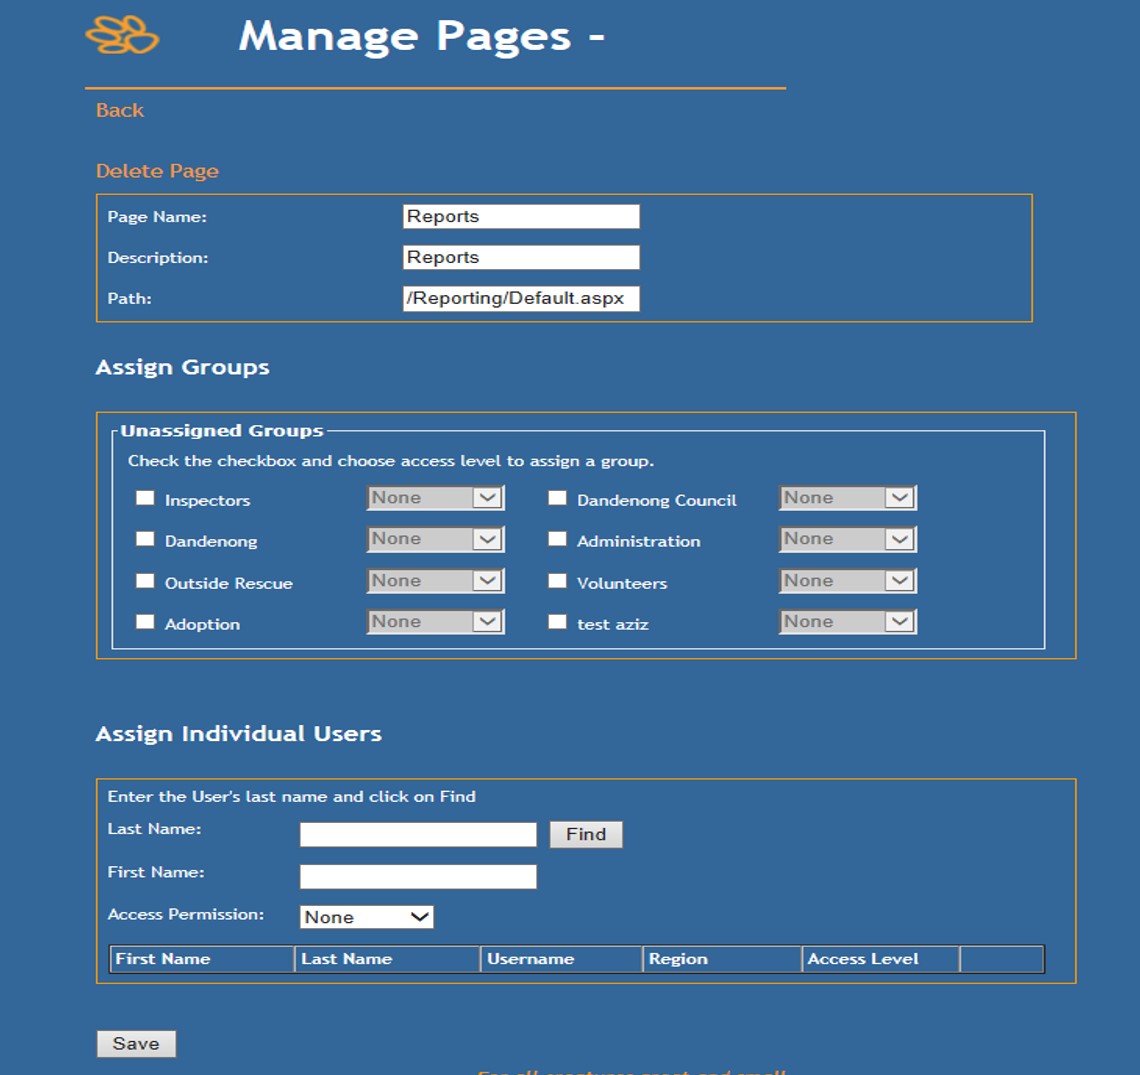
- Assign access to groups by clicking on the checkbox against those you wish to allow access for and when the drop down activates, click the down arrow to select the “all” option.
- Note: “Read Only” does not work with active links like this. Only the All or None options are applicable, but not assigning access does the same thing as assigning access as “None” so you can save time by only assigning “All” access as required.
- Although we recommend using groups as much as possible as this is easiest to maintain long-term, if you need to assign individual access to users; search for them by entering their surname in the Last Name text box and clicking the Find button. This will present all possible matching users in a pop-up. Select the user you wish and click on their name to add them to the list below, then click the down arrow on the drop-down box on the right to assign their access level as “All”.
- Click the Save button to save your changes.
To Restrict a Report Type
This process will limit access to an entire section of reports contained within the Report Types list from the Reports Menu.
- Go into Administration > Edit User Access and locate the option Manage Pages – Special Cases.
- On the resulting page, you will see a list of any pages already added here. Check to ensure the group you intend to restrict has not already been set up. If it has not, click the link, New Page.
- Click the down arrow on the drop-down list at the top of the page and select the option Report Type.
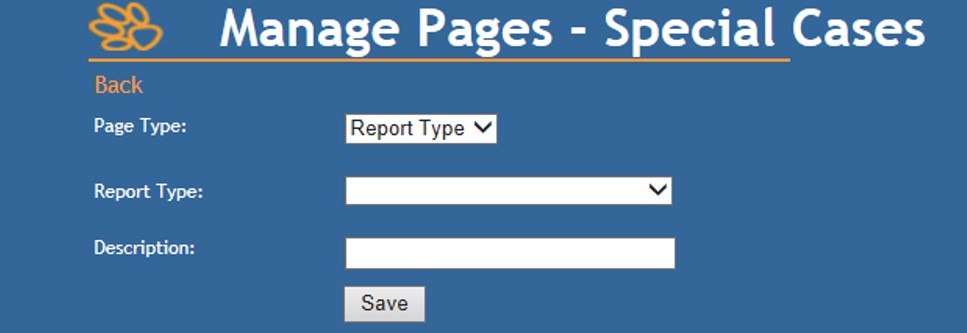
- Click on the down arrow on the Report Type drop-down list and select the report group you wish to limit.
- Click Save to return to the Manage Pages – Special Cases Main page. NB: No users will have access at this point.
- Locate the report group you just added in the list displayed on that page and click the Edit link against it to assign access.
- Click the checkbox beside the groups you wish to assign access to and select “All” from the drop-down list to assign access to a group. Again, the “Read Only” option has no effect on this page.
- Assign individual users as required by searching for their last name and clicking on their name from the pop up that will appear.
- Once all users and groups required have been assigned, click Save to complete.
To Restrict a Report Group
This process allows you to grant access to a few specific reports from a restricted report group to users at a higher level than others. NB: Group settings will override Type settings (i.e. if the user is blocked from the regular report Type list item, but allowed access to a custom Group, they will still be able to access any reports within that Group). The remainder of the reports in the Type list will continue to be secure, only the exact reports selected will be visible.
- Set up a Custom Group for your limited access users.
- See Admin - Create Custom Report Groups for information on how to do this.
- Set up any reports you want your restricted access user to use in this report group.

To Allow Access to an individual Report
This process will give a user access to a single report, even if they are blocked from the Type List it belongs to AND the custom Group that contains it. Access to an individual report will override both settings, allowing the user to find the report by name or number using the search feature.
- Go into Administration > Edit User Access and locate the option Manage Pages - Special Cases.
- On the resulting page, you will see a list of any pages already added here. Check to ensure the group you intend to restrict has not already been set up.
- Click the link, New Page.
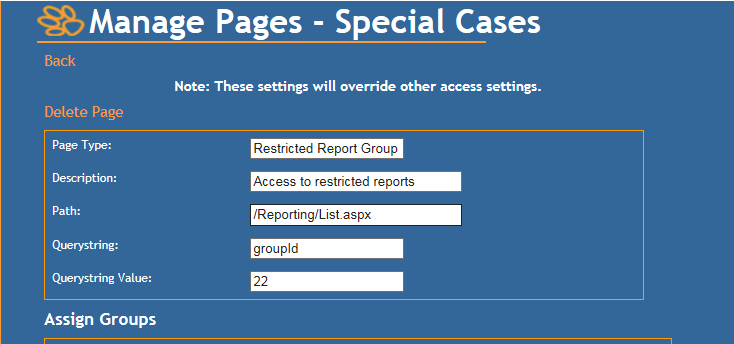
- Select Other Page from the drop-down options.
- Enter the Page Name: this should be the same as the name for your custom report group.
- Enter the Path: /Reporting/List.aspx
- Enter the Querystring: reportId
- The Querystring Value is the number of the report (you can find this in the URL of the report you wish to restrict)
- Enter a Description that will let other users know the purpose of the report group settings.
- Click Save
- Assign access to users or groups as required.
- Your assigned users or groups will now be able to access this report even if they are blocked from both the Report Type and Custom Group it appears in.
For further information on setting up report restrictions, contact support@shelterbuddy.com
Comments