
This procedure applies to persons who wants to volunteer in either a shelter or retail environment.
- Search for the person.
- If not found, click on the Create a New Entry link.
- Fill in the relevant blanks on the Add New Person page. Mandatory fields: first name, last name, residential address, mailing address if different than residential, telephone number, and gender. Depending on your organization you may be required to confirm identification.
- Click Update Details.
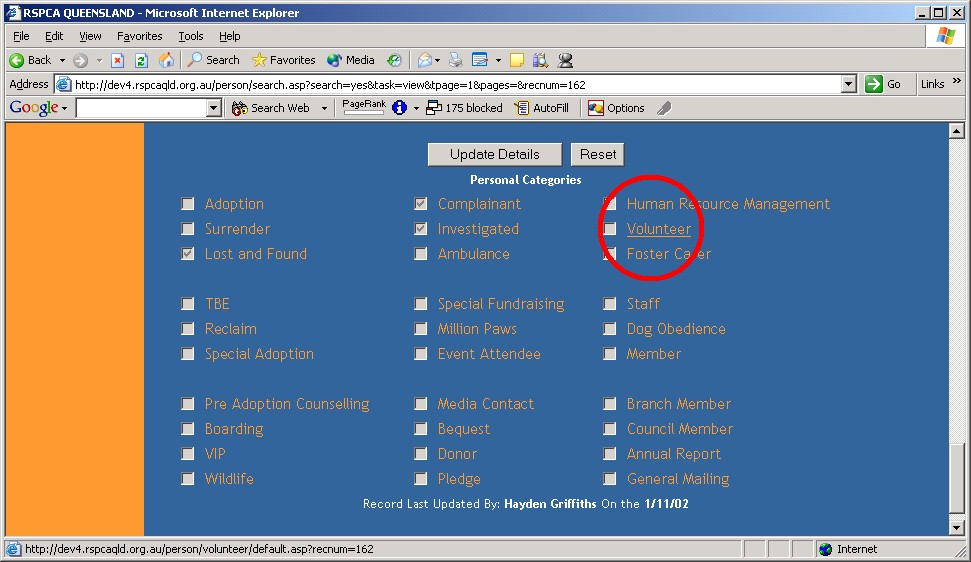
- On the Edit Person Details page, click on the Scroll To Bottom link and click on the Volunteer link.
- Complete the following:
- Participant Type: click on the down arrow to identify the type of volunteer this person will be. EX: Volunteer, Work Experience, etc.
- Training Comments: enter all notes regarding the orientation and training.
- Orientation Date: click on the Calendar Icon to select the date the volunteer went through their orientation of the shelter/shop.
- Possible Roles: there are several sections that define the different types of volunteer work. A volunteer can apply their skills to the shelter in more than one of these areas.
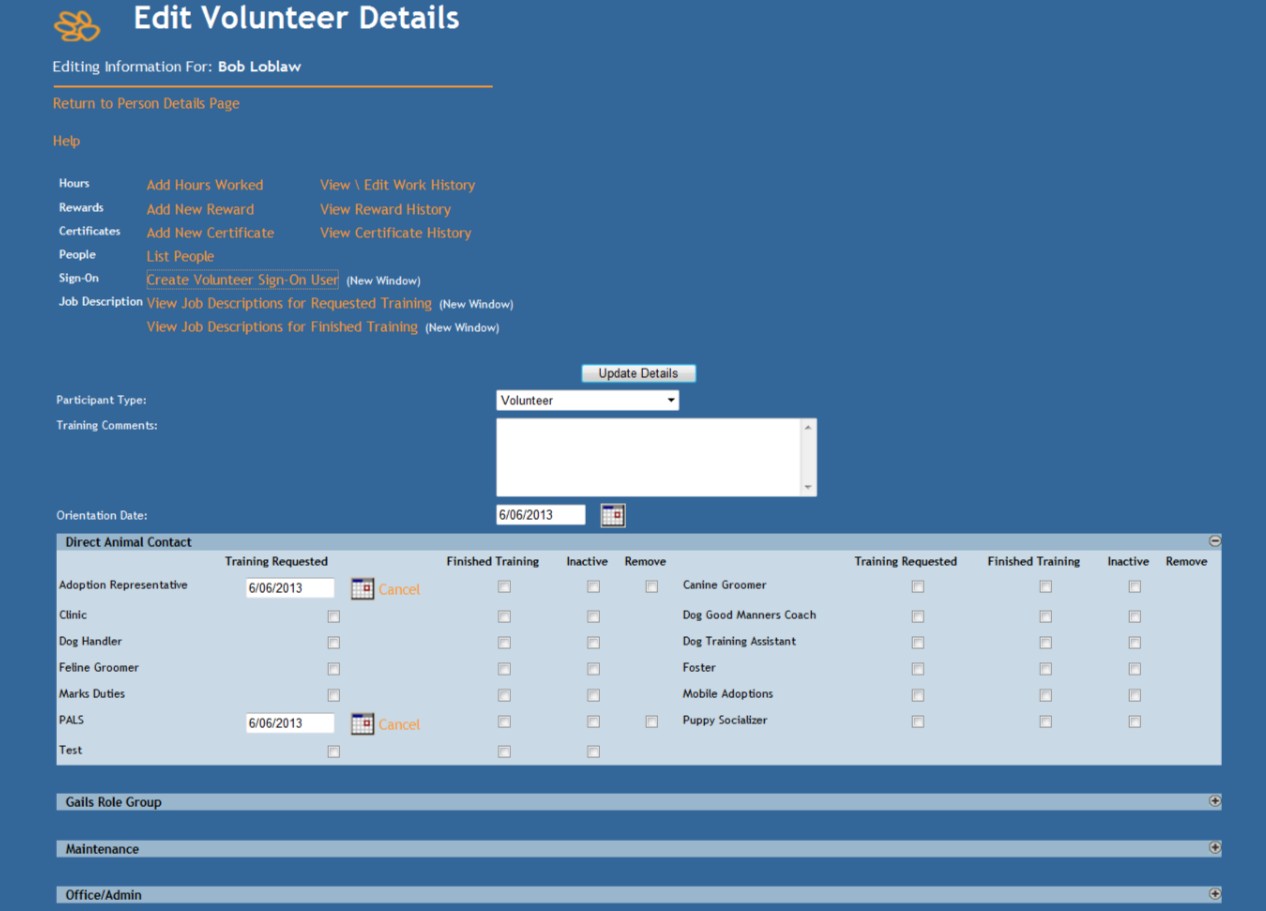
- Direct Animal Contact: if the volunteer will be working directly with the animals in the shelter, click the Orientation box next to all the areas that apply. If the volunteer has completed the training for the applicable area, click the Finished Training box.
- Maintenance: if the volunteer will be working on the upkeep of the shelter, click the Orientation box next to all the areas that apply. If the volunteer has completed the training for the applicable area, click the Finished Training box.
- Office / Admin: if the volunteer will be working in an administrative office of the shelter, click the Orientation box next to all the areas that apply. If the volunteer has completed the training for the applicable area, click the Finished Training box.
- Other: if the volunteer will be working out in the community for the shelter, click the Orientation box next to all the areas that apply. If the volunteer has completed the training for the applicable area, click the Finished Training box.
- Interview Date: click on the Calendar Icon to select the date the interview of the volunteer took place.
- Interview Notes: enter all notes regarding the interview.
- Shelter Location: if the volunteer will be working at a shelter location, click on the down arrow and select the shelter they will primarily be assigned to.
- Shop Location: if the volunteer will be working at an affiliated location such as a thrift shop, click on the + and select the location they will primarily be assigned to. If there is more than one shop location and they are willing to travel, click on the + to select an additional location.
- Available Days: this must be added after the person has been updated as a volunteer.
- Notes: enter any additional information that may be needed.
- Currently Rostered: this field will default information entered by the volunteer through the Volunteer Sign On Terminal. (Available via Advanced Volunteer Module Only)
- View Skills and Work Experience: click on the link to access the Edit Human Resource Management Details page.
- Employment Status: click on the down arrow to select Volunteer.
- Educational Background: use the drop down arrows to record the volunteer's educational history.
- Technical and Further Education: use the drop down arrows to record any additional training or certificates the volunteer may have.
- Click Update Details. This will return you to the top of the HR page. Click on the Return to Volunteer PC link.
- The emergency contact details on this page can be the same as those on the person’s details page or, if they are volunteering with a group of people from company or organization, the contact person’s details that is in charge of coordinating the volunteer day can be entered.
- Work With Children: if the volunteer is certified to work with children place a check mark in the box.
- Expiry Date: click on the Calendar Icon to select the date the certification expires.
- References: enter the names of the volunteer’s references and any applicable comments they made on behalf of the volunteer.
- Not Available Period: this can be utilized if there is a period of time that the volunteer is not available.
- Click Update Details.
- This will take you to the top of the Edit Volunteer Details page and eight new links display.
- Scroll down to the Available Days fields that will now display.
- Day: click on the down arrow to select the day the volunteer is available to come in.
- Start Time: select a start time by using the down arrows.
- End Time: select an end time by using the down arrows.
- Only for this role (Optional): If the hours being set only apply to one of the roles the volunteer is trained for, select it from the drop down here. This is optional: if the hours apply to any role the volunteer is trained for, ignore this drop down and move on.
- Fortnightly: This tick box means the volunteer only comes in fortnightly rather than weekly. By applying this option, the volunteer will only be offered as available on alternate weeks when rostering.
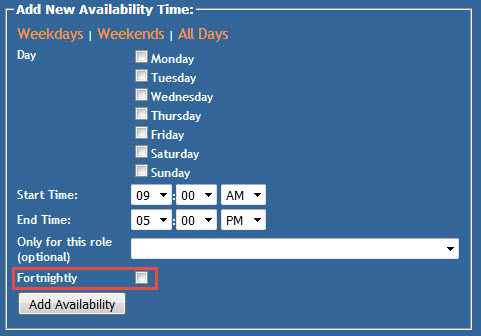
- Click Add Availability.
- Repeat the above process to add additional days.
- Click Update Details.
- This will take you to the top of the Edit Volunteer Details page.
- Click on the Create Volunteer Sign-On User link. This will open a new window containing the basic information for the volunteer to create a log on for them to access the Volunteer Sign-On Terminal. (Available via Advanced Volunteer Module only)
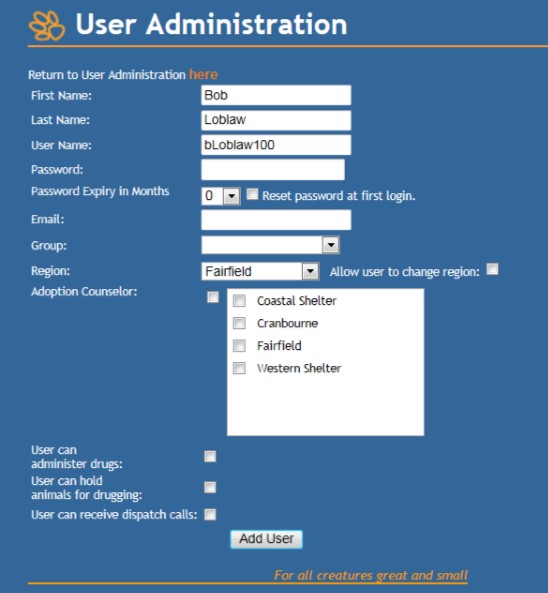
- Password: enter a password.
- Nominate if you would like the password to be reset at first login, and/or if it is to expire within a given time frame. Either of these options will prompt the user to select a new password at the appropriate time.
- Email: enter a current email address for the volunteer.
- Group: Select an appropriate user access group for the volunteer to belong to.
- Region: Nominate which region should default for this volunteer. NB: this will default to your home region.
- Adoption Counsellor: If the volunteer assists with adoptions, nominate each region they may adopt animals from.
- User can...: Ordinarily, volunteers do not deal with restricted drugs or dispatch, but some sites may have highly-trained volunteers eligible for these functions. If they are able to work with restricted drugs, or receive dispatch calls, nominate all that apply here, otherwise skip to Add User.
- Click Add User.
- Click the Close Window link.
- If the Advanced Volunteer Module is enabled for your site, Refresh this page and note that beneath the Location box there will now be options for phone numbers with check boxes next to them. There will be as many boxes as there are phone numbers entered against the Person Details.
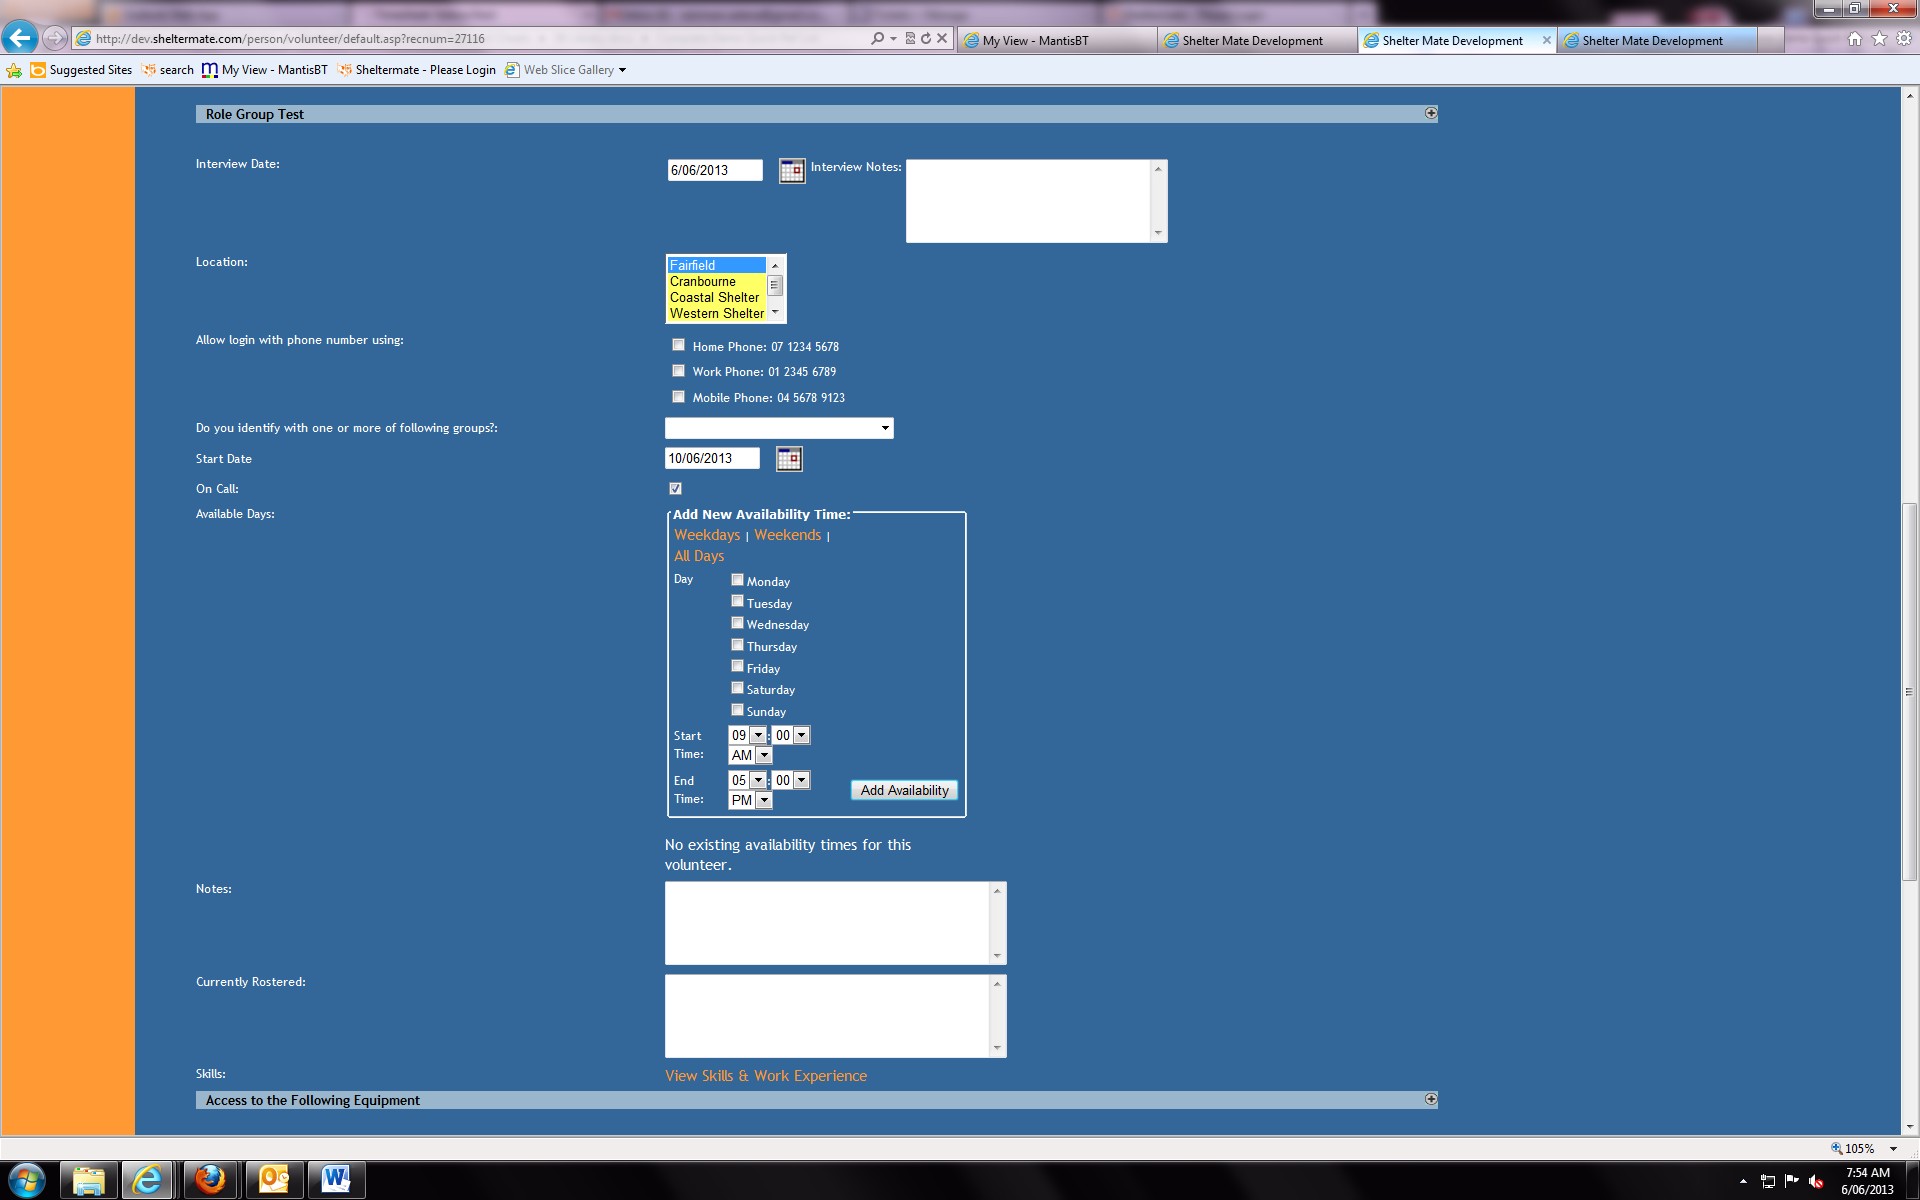
Check any applicable box to allow the volunteer to use their phone number to log into the Volunteer Sign-On module instead of a password.
Comments