
Administrators in VolunteerBuddy have access to create Locations and Qualifications, add other Administrators and, of course, work with Volunteer Rosters.
To Add an Administrator:
- From the Welcome/Search page, click the link to VolunteerBuddy in the orange left-hand menu.
- From VolunteerBuddy's Welcome page, click the down arrow against the heading More in the top right of the screen and click on the option Administrators.
- The Administrators landing page will load:
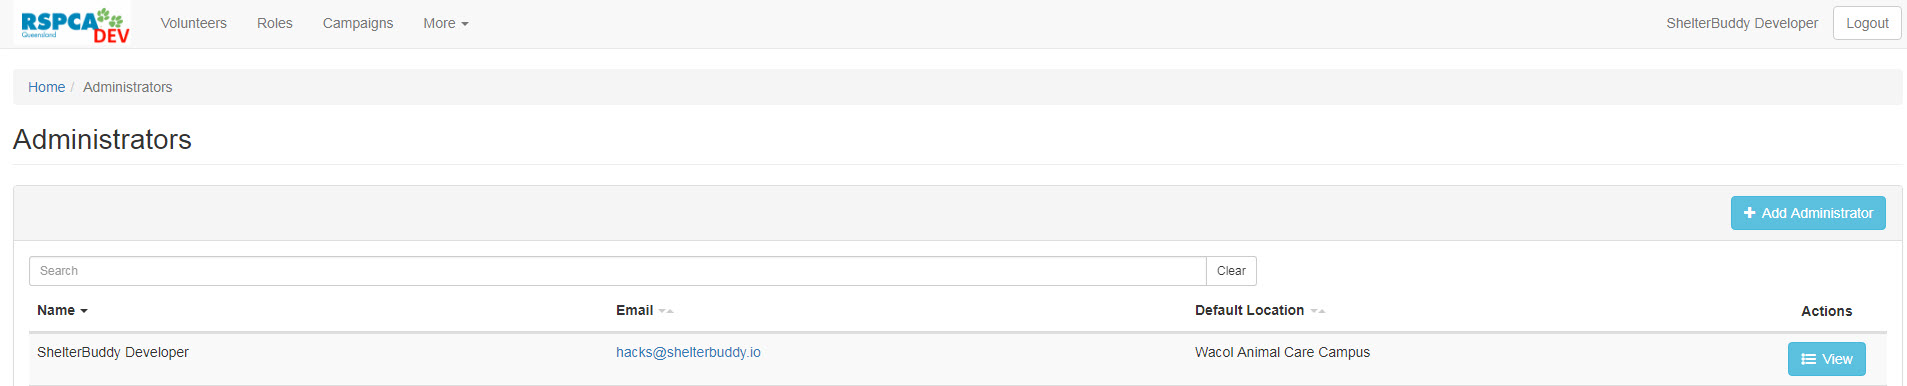
- This page will list any existing Administrators in alphabetical order, however, you can re-arrange the order in which they list by clicking the arrows next to the headings Name, Email, and Default Location. You can also search for an Administrator by entering a keyword in the search field.
- Click the button +Add Administrator.
- In the modal that appears, select an existing Shelter Buddy User from the drop down by clicking the down arrow or typing in part of their name. Click on the name to select it.
- VolunteerBuddy Administrators must be current, active Shelter Buddy users.
- Set the default location the Administrator looks after by selecting from the drop down called Default Location.
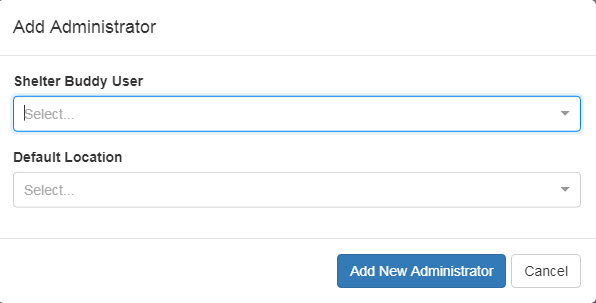
- Once added, the modal will close and the Administrators landing page will display the newly added Administrator in its list.
- To amend the Administrators, click the button View at the end of their row to see their profile and additional options. Click Delete to remove the user from the Administrators' List, or click Edit to make changes.

- From the Edit page, you may change the user's default location for VolunteerBuddy, and whether or not they are an active System User.
- Click the Save button to keep your changes, or click Cancel to navigate away without making changes.
Comments